
Instruction Manual
and
Installation Manual
for the
Rick White
Signature
Power Righter System
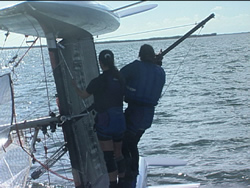 After releasing the pole from the rear beam, swing it out so it is perpendicular to the hulls |
This is a simple carbon pole system whose base attaches to near the center of your front or main beam. The carbon pole controls the righting line that runs through loops on the outer part of the same beam the base is attached to. The pole folds neatly away and is bungeed up to the rear crossbeam for normal sailing.
When a capsize occurs it still is a good idea to get the bows of the boat into the wind to facilitate righting the boat easier this also puts less load on the boat and the righting system.
 Now, raise the pole to around 40degrees and slip the stopper knot ahead of the beam loop. |
Now Watch How Easy It Is
|
|
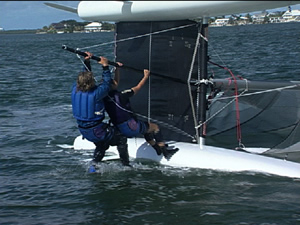
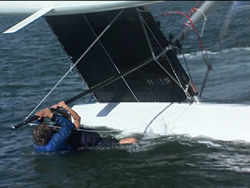
Now, reach out and grab the pole at the end and hang on it. The boat should come up very quickly.
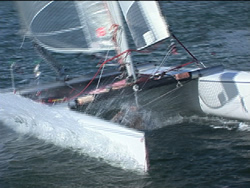
Once the boat is up, slip the stopper knot on the righting line aft of the beam loop and get back on the boat. After the boat is underway the pole will come straight back in alignment to bungee back to the rear beam. Then off you go.
Mounting the Pole
First you should have received:
1 Carbon Pole
1 Pole Base
4 Eyestraps
ss Self Tapping Screws
ss Rivets
First � The Base
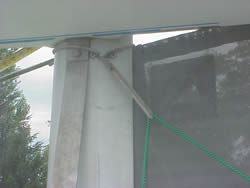
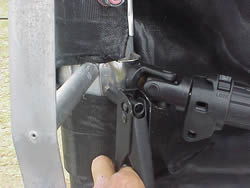 Figure 1 Here the base is mounted behind the post, but it can be set off to either side, if you so desire and will not affect the righting of the boat. Here we were using ss rivets, but you can use ss selftapping screws as well. |
Be sure the pole can swing to a perpendicular angle to the boat, however, before it hits the dolphin striker. If you are using rivets, use only stainless steel. You could also use selftapping stainless steel screws.
Position the base of the pole where you want it and mark where the holes line up on the beam. Then drill and install the base with ss rivets or ss screws.
|
|
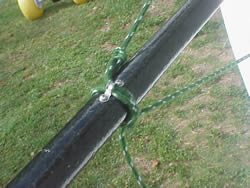
You also should have four eye straps. Two of those go on the main beam just to the inside of the hull. Again, you must either use stainless rivets or selftapping screws (lot of load). Also, rather than having the eyestrap directly on the bottom of the beam, try to mount it so the loads are sideways to the eyestrap and not pulling straight out from the beam.
Then tie line around the main beam, if possible, and slip a loop through the eyestrap.
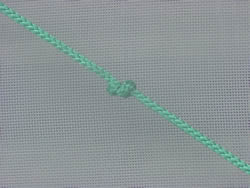 Figure 3 � A stopper knot should be tied into the righting line aft of the beam loops. Try an oversized Figure 8 Knot (Say a Figure 16 or 32). Simply add a few more twists to the loop before putting the bitter end through it and this will make the stopper knot larger. |
Next tie stopper knots in both sides of the righting line aft of the beam loops. Use a Figure 16 Knot (a Figure 8 Knot with more twists to make it bigger). It should be located about 12-18 inches aft of the beam loop this will give the pole an upward angle of about 30-45 degrees.
Fourth � Mounting the Retainer
The other two eyestraps are used on the rear beam for the bungee retainer
in order to hold the pole up out of the water. We just installed one on
a Hobie 20 and used the tramptensioning lines instead of drilling holes.
You may have the same thing on your boat the less drilling the better.
Fifth � Running the Righting Line
Finally, tie the line to one side of the pole at the eyestraps, run it
through one of the beam loops, the parallet to the main beam and through
the other beam loop and then back to the eyestrap on the opposite side
of the pole and tie it off with little or no slack in the line. If you
do have slack, just tie a piece of bungee between the lines running from
the eyestrap to the Harken to take up the slack and keep it out of the
water while sailing.
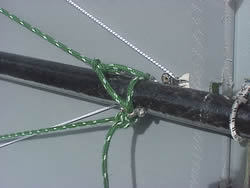  Notice that the righting line is not tied directly to the eyestrap, rather through the eyestrap and then it is actually tied around the pole. That way the eyestrap will not cut through the line if loads get heavier than normal. |
Be Sure the righting line is not tied directly to the eyestraps. In a recent mishap where the mast was full of water and the loads were extremely high, the righting line failed right at the eyestrap. So, to be sure, run the righting line through the eyestraps, but actually tie to the pole.
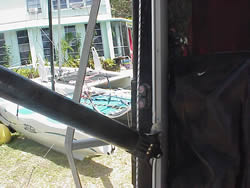 Figure 6 � Here the pole is pulled away from the rear beam and about perpendicular to the length of the boat. Now, we have raised or canted the pole upwards to around 40-degrees to allow for more righting moment. The stopper knot needs to be slipped ahead of the beam loop. Then get to the end of the pole and right the boat. |
How to Use the Power Righter
To use, detach the bungee holding the pole to the rear beam, swing the
pole out perpendicular to the boat, then raise it up to around 40degrees
and slip the stopper knot in front of the beam loop. You then only have
to grab the pole by the end and pull.
Warning: If you are
righting the boat in shallow water, be sure the pole is not fully extended
to perpendicular to the boat after it is righted or it will hit bottom
and break the pole or something else. You will need to be folding it back
toward the rear beam about half way through the righting process.
DISCLAIMER:
This accessory is meant only as an added help to get your boat righted
up.
While it has been effective in most conditions in our tests, we will in
no way garantee that it will always work and in all conditions.
Basic Safety and Sailmanship principles should always be respected:
- Always wear a LIFEJACKET.
- Make sure that your mast is SEALED, water entering the mast can overpower even the RIGHTING POLE and cause the hardware or lines to break.
- Inspect The Boat and Righting Pole before each sailing session.
- To keep the weight as low as possible, we use a 3/16th line with maximum breaking strength of aproximately 1200 lbs -- tying knots could greatly reduce the working load of the line, replace the line for a heavier gauge if you are going to use the Pole in rough conditions or overload it.
- Replace the line after each capsize recovery for maximum safety or if it shows any signs of wear, chaffe or sun exposure.
- Practice righting the boat in protected condition where help is available if needed.