 Welcome
to the
Welcome
to theHobie Wave Class
Sponsored by
International Wave Class Association (IWCA)
| Forum/Discussions | Constitution & ByLaws, Rules | Officers & Board Members | Info on Nationals & NA Championships | Schedules | Results & News |
Welcome
to the
Hobie Wave Class
Sponsored by
International Wave Class Association (IWCA)
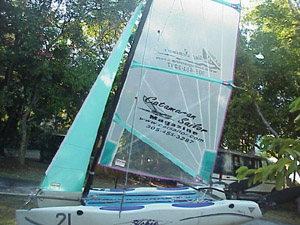
This is in regard to the development of a Youth Hobie Wave. The idea is to create a fun, somewhat fast, hard-to-capsize, easy-to-right, double-handed, double-trapeze boat for youth sailors. It can also be used by adults for some sailing.
A brief history of performance:
In essence it appears that the configuration is very much faster than the stock Wave. Two kids would weigh about the same as I do (200) and could have a great time double-trapping this boat around a course.
More info:
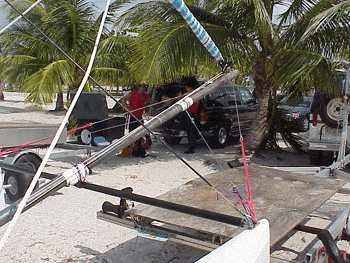
Not shown in the pictures below are two items that have not yet been set up:
|
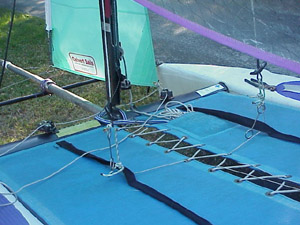
This is an overall view with the main and the Hooter System |
|
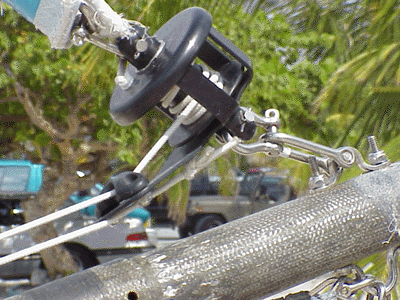
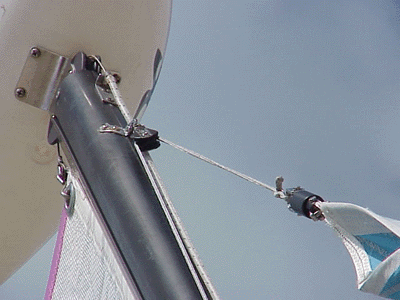
This is a view of the end of the pole and its attachments, and the furler drum and furler sheet arrangement. Note that the white furler sheet goes from the furler and back, attaching below the furler drum. This gives the system a 1:2 purchase for faster furling. |
|
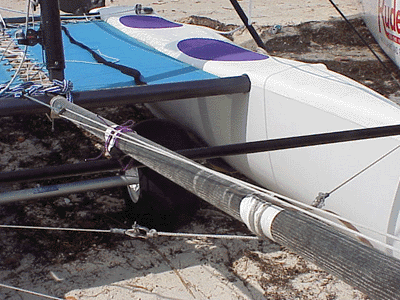
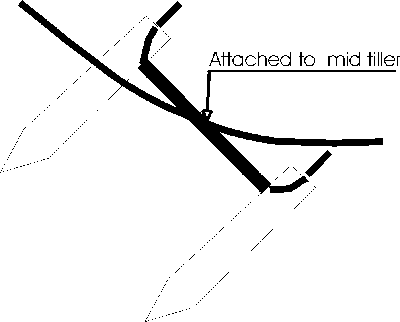
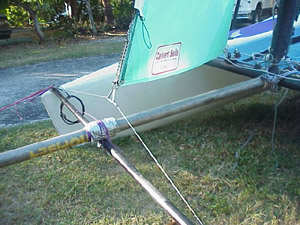
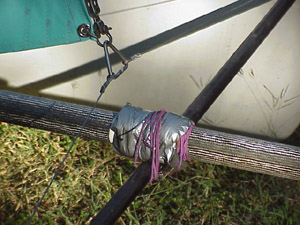
This is an overall view of how the pole is attached. This needs some major improvement in looks and practicality. While it was mostly wire, and non-stretch line, it still managed to stretch quite a bit. The spreader pole was tied to the pole as well. When a lot of load was place on luff of the Hooter, the bow sprit bent up with line stretch and consequently the spreader pole bent up as well. It would be desirable to put a lot of tension on the luff control in order to make the boat perform well to weather, but with the present set up, this is not quite possible. Recommended would be at least a small dolphin striker for the bow sprit -- that would keep the pole from bending so much and possibly take some load off the spreader bar. On the spreader bar, something of this nature seems to be needed. In a distance race of 22 miles upwind in light air I was ahead of 4of 5 Hobie 16 sailors for about 1/3 the way. It was pointing higher and going as fast as the 16s, but then it started losing its pointing ability. It was then I noticed the bows coming together. This particular bar is not the greatest in the world. Perhaps a spreader bar similar to the Nacra 6.0 would be possible. |
|
Again this shows the rigging setup discussed above. Also, with this view you can see how the white furler sheet goes from the furler to a small turning block and back to deadend below the furler, giving the furler system a 1:2 purchase. |
|
This is a closeup of the furler and the 1:2 purchase setup |
|
More on the 1:2 purchase. Note that the actual retrieval line is much larger and more comfortable to handle than the small, white furler line. This allows two feet of furling for every foot of comfortable sheet you pull in. This particular turning block is not adequate -- it tends to twist and the line gets caught between the side of the block and the wheel. I need to replace this. It could be smaller and be built to not allow the line to jump off the sheave. |
|
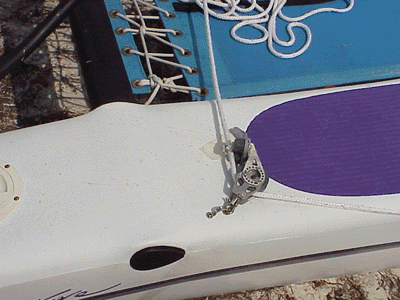
The bow sprit is attached to the main beam quite simply. The aluminum piece slips over the end and is glued. A bolt is threaded from the inside out and slips into a small hole drilled in the main beam. The flange does not seem necessary, but I already had the piece that was off of another experimental rig. Also, here is where the furler sheet is cleated. Not crazy about the cleat. Preferred would be a swivel cleat that could be sheet and cleated from anywhere on the boat. The reason I used this cheap (not price-wise) cleat was to save some money. |
|
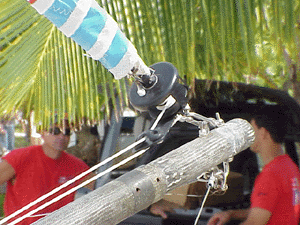
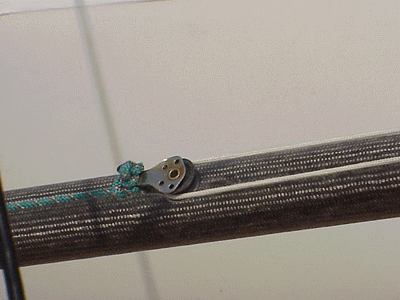
Here is a shot of the masthead setup. I tried going more fractional before but the boat simply did not perform much better than a stock Wave. There was need to open the slot more since the Wave does not have a main traveler car. The way to do so was a longer pole and making the head of the sail higher. It worked. The boat is much faster with this configuration. And the pole itself did not bend in any direction more than normal -- very rigid! That means we do not have to worry about masts breaking. |
|
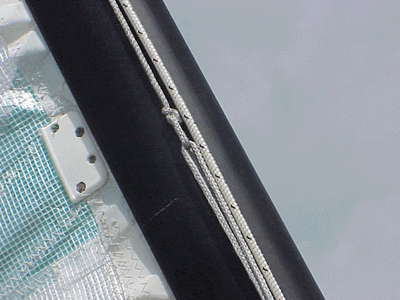
As mentioned above it is important to get good luff tension on the Hooter to go to weather. So, all that was needed was a bowline tied into the halyard. The halyard was run down and through the horn cleat on the side of the mast, back up to the bowline and back down to a cleat. It would be better if this could be run through a small cheek block on the side of the mast, but as you can see this is pretty much jury-rigged. |
|
This is the cleat for the halyard. |
|
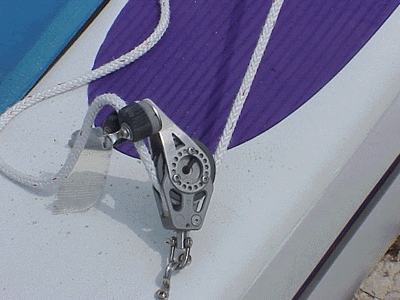
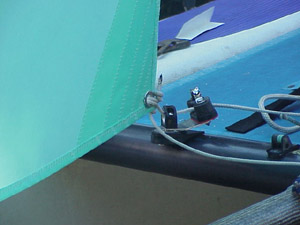
When we mounted the turning blocks this seemed like a decent location, but it is also exactly where folks sit to hike out aft on the boat. Also, despite large washer as backing plates, the material is suspect (it didn't seem to really tighten up, rather just squeezed the material. |
|
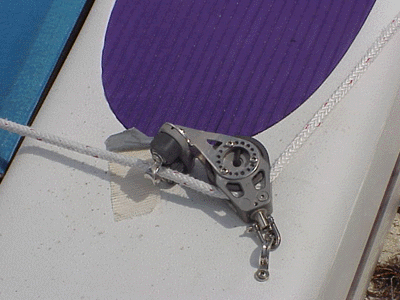
These particular blocks are really nice since there is no limitation on how high or low you can set the cleat. |
|
Close up of the block. By removing the three screw you can set the cleat angle to nearly any position you want. Really nice. |
Newest Addition
This will add a jib, Hooter and trapeze to the Wave to make the WaveHP
|
 Here you can see the blade jib is sheeted very simply to the main beam. The trapeze is located out of the way, yet easy to reach. |
|
|
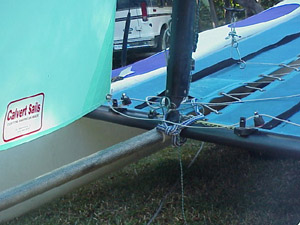
Two wires join at the triangle piece where the forestay attaches. this allows for a lot of forestay tension and a tight luff entry for the jib. There is a compression bar between the hulls to stop the hulls from coming together. |
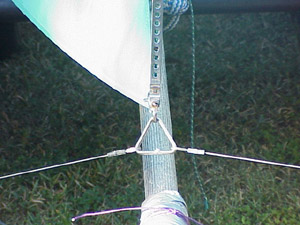 A close-up of the forestay rigging. |
For more info on installation instructions, click here!