As I clean up my new-to-trailer/Nacra 5.2 this winter, I see that the rear mounts have hard rubber rollers. These are about 12" long and 2-3" in diameter. Nothing special. They are standard stock items at any boat store.
When I had my previous Nacra, I had nice fiberglass cradles the held the hulls on all four corners. I can find these again new, but they are not inexpensive.
Is this worth the upgrade? Am I risking point loading the hulls with the rollers? I am on the fence with regard to replacing them. Any thoughts?
See my article and Forum posts on a flatbed. I now have converted all of my trailers to flatbeds and can haul any sized boat at any time (plus other stuff if not going to a regatta), without adjustments or changes. In the Search on this Forum just use the keyword "Flatbed" Good luck, Rick
Thanks Rick. A flatbed set up is desirable. You have given me much to think about...
The old EZLoader trailer I have has very narrow rails which causes the 2" sq cross bars to hang out over 2 feet. Unlikely I would be able to remove them and expect the marine ply to work unsupported. I am planning to mount them under the frame rails to lower the boat.
What I think you are telling me is the official cradles are unnecessary and I may be able to use large wood/carpet pads for a more universal design.
I like to keep the rear rollers for loading more easily, but once on trailer I then have small wooden 1x6' piece of wood about 10-12" long for support, that I slip underneath the hulls once its on the trailer. I also make two small pieces across the bottom side of these "pads", so they don't slide off the rollers when trailering. Instead of the front rollers, I have pads like on the rear, but they are permanently mounted where the rollers were. I keep the upright part of all 4 rollers in place, to keep hull from sliding off the side.
Jim Casto NACRA 5.5 & NACRA 5.7 Austin TX Lake Travis
Re: Trailer - Cradles vs Rollers
[Re: jcasto1]
#125796 01/08/0812:05 AM01/08/0812:05 AM
You are correct: def- a straight line will only be tangent to a circle at one point, in Mechanical Engineering/Statics (beam loading) that is called a point load. So years ago I removed my “rollers” and installed carpeted bunks/beds as I got tired of fixing the dents on the bottom of my hulls every winter.
So here was my solution, I make bunks approximately 16-18” wide using PRESSURE TREATED 2”x8”s (stacked two high) and bolt them to the trailer crossbar with galvanized carriage bolts. If you want to be really fancy you can make a small wedge piece to put on top outside ends. Cover with ½” styrene and then cover with Nylon carpet. Be careful to pick a material that DOES NOT retain moisture, or you can cause “gellcoat blisters to form! (Astro turf doormats work also) I can carry any boat from a H-14 to my P-19mx on my trailer.
Cradles: Go to a home development construction site and look for some large (+10”) plastic water pipe/gas main scrap ends (they should be blue or green in color). Now if you heat them up to approx 210-225F the material will became plyable/moldable. So cut the required approximately sized piece ( depending on pipe dia it will be 1/2 or 1/3 of circumference). Heat and mold to the hull, being sure to place a pad of the approximant thickness of the carpet/padding to be installed in the cradle to protect the hull from the heat. Cool with cold water. NOTE: Do Not let the girlfriend/wife know what you have cooking in the oven, they will not appreciate cooking plastic pipe in the same oven they bake their muffins in!!! ( been there, done that, had that conversation!!!) Be REALLY careful or the temperature, +250F and you will have SMOKE!!! I have made cradles for beach wheels and trailers using this method. To mount to a trailer you will need to install a block or brackets on the underside of the cradle, If the cradle can pivot/rock fore and aft it will help with loading the boat on the trailer.
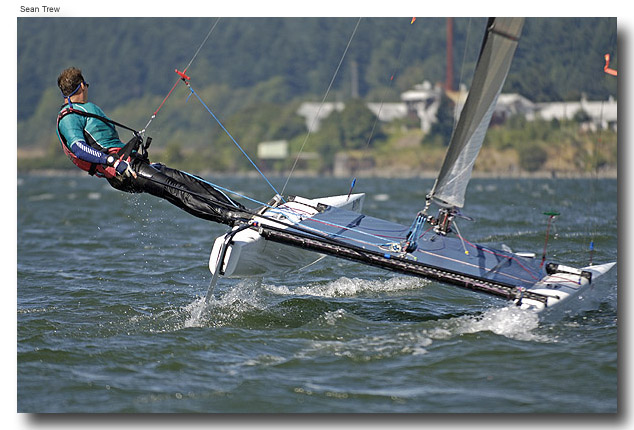
What about 'hanging' from the beams, like an A-cat? Very easy to use, no wear and tear on the hulls, and it rides high enough off the trailer to store your gear, plus keep tire spray down...
Ya, buying something is OK ... but it is so much more fun to be "crafty" and free is really hard to beat!!! Look out Martha (Stewert), us guys can be crafty too!!!
You can also make hull cradles at home by heating up some PVC half-pipe sections in the oven (be very careful here to not overheat it as it will melt and make a mess in your oven). flip your hulls upside down, put a barrier between the hulls and the pipe and just let it sit there over night.
Then figure out how to mount it on the trailer crossbeam.
That is a nice looking A-cat trailer. Some of the guys at West River Sailing Club have the same set-up. In fact we are going to build a set-up like that for Mark S this spring. As for using it for bigger boats ... A A-cat wieghs how much??? 164lbs I believe, and has no dolphin striker in the way. My H-18 wieghs 426 lbs (as wieghed at the H-18NAs) and with wings??? maybe 460lbs??? I would need a hoist or a small workparty to lift my H-18 that high. And my P-19 weighs +375lbs at least. I'm getting to old and febble ...
The store bought cradles are almost all fiberglass construction and can not be heated to change their shape.
Let me throw out a little idea/comment/alternative solution to the tire spray comment earlier: MUD FLAPS on the fenders!!! I did it years ago when I had a wheel/axle seal that leaked slightly and on long trips the rear of the hulls would have little spots grease on them. I found a old truck mud flap laying by the road and ....
I like being crafty, its so much fun!!! Now if I only could find some little StainlessSteel reclining girls, you , the ones with the pointie ti--ies !!!
Good Luck Harry
Re: Trailer - Cradles vs Rollers
[Re: HMurphey]
#125808 01/09/0803:41 AM01/09/0803:41 AM
Another way to make cradles is to form them up directly on the hulls. We did this for our Hobie 17's. Use waxpaper first, then fiberglass mat and resin, with plywood backing.
Our cradles are about 14in long, and rest on the trailer rollers, lower boat, and on the boat cross bars, upper boat. We have used this system on our 1986 and 1989 H-17's for 26 years. We know it is best to have a separate support for the upper boat, but the H-17's are tough, and show no signs of fatigue, after thousands of miles.
Another tip on double stacking the H-17's. Put the wings on the lower boat, backwards, then load the upper boat. This keeps the boat from sliding off during loading. Then add the upper boat wings, also in backwards. This also allows the boats to be loaded, and off loaded by one person. Both masts are mounted on the front post on the trailer, just ahead of the front cross bars. The rear support is on the aft cross bar, upper boat.
Caleb Tarleton 6446 Tom Tarleton 6185
Re: Trailer - Cradles vs Rollers
[Re: H17cat]
#125809 01/09/0808:42 AM01/09/0808:42 AM
Our trailer has carpeted 2x8 bunks between the front and rear crossbars of the trailer. They flex to match the rocker of the hull perfectly, no point loading, along the lines of Rick's flatbed. I've found a bucket of water on the carpet to lubricate makes off/on much easier. My modifications to this concept is to upgrade from carpeted boards to that new composite decking (I think Timbo used it on his trailer?). They're narrower than a 2x8, will use two side by side with a small gap in between or canted to create a shallow vee. Also adding a 10" vee roller at the rear beam. Those tilting double rollers are nice but sure are pricey.
John H16, H14
Re: Trailer - Cradles vs Rollers
[Re: _flatlander_]
#125810 01/09/0810:56 AM01/09/0810:56 AM
I told myself that I couldn't upgrade the boat until the trailer was finished. So, over the holiday I finally got around to modifying the trailer. Thanks to all the ideas here I ended up with a "blended" solution that I think will work well with the older EZLoader and Nacra 5.2.
I removed all the old trailer hardware and sanded the three layers of spray can black paint off the frame to get it ready for Eastwoods Rust Encapsulator (silver/grey). I have used this before to restore cars and it works well and can be used with a rust converter. It can be thinned and applies great with a small sprayer.
Next I relocated the cross bars below the main rails. With 3x4 main rails this brought the boat down considerably. I removed the rear rollers and cheesy front cradles and welded on a set of angle braces to carry a pair of carpered 2x6x8 bunks.
I really liked Ricks idea to make a true flat bed out of the trailer to extend the trailer's utility, but the older EZLoader main frame rails are so narrow, and the axle truck (undercarriage) is just angle aluminum, I couldn't really see myself pulling up to Home Depot and driving off with a forklift of supplies.
Next I welded up some supports for a solid deck. I choose 2x6 white PCV decking and bolted them inside the EZLoader frame rails. It is strong enough to stand on, didn't add any significant weight, much lighter and less expensive than the Trex or any of the composite decking and like the composite material it can get wet.
The trailer received a fresh coat of paint, new bearings, tires, wiring (6 pole), manual winch and here is the big suprise - a wireless remote control winch.
Having too much time, I decided to tackle a new approach to stepping the mast. It has been about 10 years since my wife and I last sailed together. She reminded me when I bought this boat that for her, raising and lowering the mast was the worst part of sailing... There are a few other issues, but I'll save that for another forum:)
So, I mounted a wireless remote control ATV sytle winch on the trailer tounge, at the location where the mast support is mounted (mast support on this trailer is on the front, approx three feet behind the receiver). I used a 1 1/4" schedule 40 6160 aluminum pole approx 7 ft long as the lever. Two straps are positioned from the top of the pole to the outsides of the front cross beam to center the pole while the mast is raising and lowering. The foot of the pole is mounted into a large rubber trailer cradle that it bungied to the foot of the mast. The winch cable is hooked to the forward stay, and with the remote up it goes... and with the remote...down it comes.
The winch is wired through a 6 pole trailer plug to a removable key hard cut off on the trailer mast support. This is to prevent the winch from being activated accidently. I have also been moving it around the yard with a small Kubota tractor. The tiny battery from the Kubota is plenty to raise and lower the mast several times. The whole thing cost a little over $100.
It has been raining lately, and given our holiday commitments, I was stealing odd times to complete this project, as a result I am photo poor. I do plan on taking pictures this weekend and a short digital movie of the intense action: up...down....up....
Thank you for all for your ideas! It really inspired me. And now that the trailer is done, maybe I can focus on the boat.
Perhaps you should put a sail on the trailor and sail that around.... LOL, just kidding.... hope you get to enjoy the boat and its new "pimped out" trailer
For those of you in the snowy regions a three or four place snowmobile trailer works pretty well and you can get a used aluminum 4 place tandem axle with brakes for about $2500. Most are full legal width at 102"
look for some large (+10”) plastic water pipe/gas main scrap ends (they should be blue or green in color). Now if you heat them up to approx 210-225F the material will became plyable/moldable. So cut the required approximately sized piece ( depending on pipe dia it will be 1/2 or 1/3 of circumference). Heat and mold to the hull, being sure to place a pad of the approximant thickness of the carpet/padding to be installed in the cradle to protect the hull from the heat. Cool with cold water. NOTE: Do Not let the girlfriend/wife know what you have cooking in the oven, they will not appreciate cooking plastic pipe in the same oven they bake their muffins in!!! ( been there, done that, had that conversation!!!) Be REALLY careful or the temperature, +250F and you will have SMOKE!!! Good luck Harry Murphey
Harry,
Is the "good luck" meant for success in getting the section of pipe shaped the way you want it, or getting it heated in the oven without getting caught by a wife/girlfriend. I think on some level, I am still in trouble for running some automotive parts thru the dishwasher back in my Mustang Restoration days. ( I STILL remember THAT conversation )Not sure I wanna take a chance on putting boat trailer parts in the oven. It IS a heck of a good idea, and maybe the next time she and her sister do a "Girls Weekend, I'll be getting some new trailer bunks formed up . Thanks for the additional tip on the maximum temp to use when softening the sections of pipe. Those sections work pretty well on 18's without any custom fitting, but I am working on a 16 for a friend this winter.
Stephen Hobie 18
Life is not about waiting for the storms to pass... It's about learning to dance in the rain
Shaping the plastic pipe is the easy part. After the first time I acquired one of those "toaster ovens" (large size) and I now use that out in the garage (out of sight). Be sure to use a oven themometer and slowly bring the tempature up checking every 10 minutes or so. When you get it just right its like a thick sheet of modeling clay. I've molded it by using a upside down hull or by using rachet straps and "pulling" the plastic pipe up against the hull. I like the upside down hull method best. ( ...that's why you keep the extra set of hulls in the backyard, to use as molds!!!
Would you have been in trouble if they were Chevy parts???
2952miles --- Newtown Square Pa to Harrison Hot Springs, British Columbia.
Harry
Re: Trailer - Cradles vs Rollers
[Re: erice]
#125820 01/10/0812:46 AM01/10/0812:46 AM
If i would have told anyone 5 years ago i would be exited about watching a remote controled winch videos.... i would have been laughed at... but a remotely controlled wench!!! now thats a video
Re: Trailer - Cradles vs Rollers
[Re: erice]
#125825 01/10/0811:41 AM01/10/0811:41 AM
Eric, Johnathan, Andrew, thank you you for the kind words. I kind of thought I was hanging out here with a crazy idea better suited for monster garage.
Eric - I do have the captive mast base and rigged for only the main and jib. We need to rebuild our basic sailing skills before I add a spin. Maybe by the end of this season we will be ready. FYI - You can't see it in the pictures, but I have most of Airborne's 5.2 rigging (sails, barber hauler setup, main and jib blocks, and spares). The hulls need cleaning and polishing then I plan to install our CF numbers, grip tape, foot straps and new graphics. That should make it presentable and functional.
Before we head out to sea, we also need to replace our 10 year old sailing gear (wet suits and splash jackets). Hate to be cold and uncomfortable the first few times out as I try to rekindle the family buzz for sailing.
By the way Eric, thank you for the youtube recommendation. I learned something new last night (how to post a video)... that every 14 year old already knows. Now I just need to figure out how to shoot a short movie that doesn't consume 100MB of space in less than 2 minutes.
for smaller file sized movies, ie youtube type movies, i've stopped using my digital video camera and started using the video function of my digicam. it can easily be set for various levels of compression before shooting
eric e 1982 nacra 5.2 - 2158 2009 weta tri - 294
Shooting low filesized movies
[Re: HealeyBN7]
#125827 01/11/0809:40 AM01/11/0809:40 AM
A great way to shoot longer movies and post them is to use a newer MAC. If you have a friend with a MAC they may be willing to help. They all come standard with IMovie. It is a very user-friendly program, and has pre-set output settings that will provide good results under 100 megs) and have decent quality.
Re: Shooting low filesized movies
[Re: ]
#125828 01/11/0810:20 AM01/11/0810:20 AM


![[Linked Image]](http://http://www.acatsnw.com/trailer/photos/rich/DSC04562.jpg)