Gavin & CatRon,
Thanks for the compliments and the interest. Here is a list of my steps in a general sense. I will be glad to answer any specific questions as well.
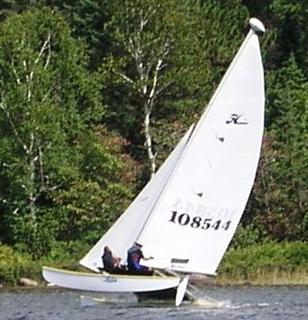
(1) When I selected an H16 for restoration I looked for a boat with no delamination, good castings and non-skid in good shape. Non-skid is next to impossible to repair to any degree of cosmetic beauty. It generally has to be re-done completely, and since I wanted a boat that looked original when finished, I didn`t want to re-do any non-skid. As for the rest of the hulls, I really didn`t care how bad they were (mine were bad) because I was going for a total refinish anyway.
(2) The entire boat was disassembled and all hardware was removed from the hulls and supports ...only the pylons remained attached.
(3) No less than 3 detergent scrubs (emphasis on scrub) were performed on absolutely everything. All stainless hardware was washed / cleaned with a de-scaler and then polished. All aluminum casts were scrubbed with straight muriatic acid and abrasive pads (using care not to expose anodized parts to the acid). After this, they were cleaned and polished with an aluminum cleaner containing a polishing grit. All anodized aluminum was cleaned (gently) with the same technique but without the acid.
(4) All gromets were drilled out of the tramp. Then I did two detergent scrubs with a brush followed by two degrease/dewax/de-silicon wipe-downs using a professional product for this type of removal (RM 900 by B.A.S.F). This last step is crucial for anything being refinished and its importance cannot be overstated. I use the technique whereby clean cloths are constantly folded, then wiped, then exchanged - always in one direction only.
(5) The tramp was then re-dyed using a quality automotive vinyl dye (not vinyl paint) and new gromets were installed.
(6) After 2 or 3 detergent scrubs, I used RM 900 on the hulls at least 3 times using the above technique. A scrub brush was used aggressively on the non-skid in addition to the wipe-down method.
(7) Being careful not to touch the hulls with bare hands too much (grease contamination) I proceeded to sand the whole works down with 80 grit and a RANDOM orbital sander. This removed as many scratches and defects as possible. I sanded completely through the gelcoat layer only when absolutley necessary to remove a bulge or defect.
(8) I used vinyl ester resin to patch and fair the small dings and gouges/scratches. Some scratches had to be dug out with a dremel in order to get the resin in for patching. The keels were done with either epoxy and fumed silica as a filler, or the vinyl ester (depending on severity). Just make sure that only epoxy is used if the foam core is exposed because the polyester or vinyl ester will dissolve the foam.
(9) The repairs were sanded smooth (with 80 grit) using either a sanding block or the sander. However, using the orbital sander for this kind of fairing can be difficult and takes a lot of experience to do it well - the block may be better for most. Also, these last few steps were repeated several times (a ton of work) using different types of angled lighting to detect the hard-to-see defects and thus begin another round of repairs. These subtle defects will not be so subtle after the high-gloss two-part polyurethane is ultimately applied.
(10) Once I could no longer find any defects. I progressed my sanding up to 180 grit. Then I rubbed chalkline chalk dust all over the hulls and found many other scratches and pinholes to fix.
(11) After doing the chalk thing twice, I sprayed the hull bottoms down with cheap red auto primer and proceeded to sand all the primer off. The red primer remained in all the small defects I had missed - and there were many. I did this step twice. Then proceeded to 220 grit when everything was finally perfect.
(12) One more degrease/dewaxing as described above.
(13) After building a ventilated paint booth in my garage (using tarps) and wetting the floor constantly to keep dust down, I used compressed air followed by a tack cloth on the hulls. I sprayed on 3 coats of EP-FD epoxy primer by Endura (last coat thinned %15) with wet-sanding between the 2nd and third coat. Followed by 3 coats of EX-2C two-part polyurethane topcoat (also by Endura) with the last coat thinned %15. Note: on the hull tops, only one coat of primer thinned %15 was used followed by the same topcoat application as the hull bottoms described above. I did this because I was concerned that applying too much paint over the non-skid area on the hull tops would ruin the texture of the non-skid. As it turned out, I am very happy with the results. FYI - Each coat of paint/primer on the hull bottoms took about 20 - 22 oz of paint (total per coat for both hulls), and about 10 oz of paint (total per coat) was required for both hull caps/tops. This paint is very expensive, so this last bit of info is important in buying and mixing the appropriate quantities.
Hope this helps,
Dave