Announcements
New Discussions
Best spinnaker halyard line material?
by '81 Hobie 16 Lac Leman. 03/31/24 10:31 AM
Previous Thread
Next Thread
Print Thread
Rate Thread
Hop To
Page 1 of 6 1 2 3 4 5 6
1740 #259959
06/02/13 07:21 AM
06/02/13 07:21 AM
Joined: Apr 2013
Posts: 858
Victoria Australia
Pirate Offline OP
old hand
Pirate  Offline OP
old hand

Joined: Apr 2013
Posts: 858
Victoria Australia


1740 Jurassic Karp cool


History:
Built by AJ Ginning from South Australia around ~1995 and originally named ...
"Pink Bits II " .....
AJ built a number of timber boats and at least 3 other mosquito's were constructed after 1740 by him.

Originally built for cat rigged only sailing a few minor changes were done during the construction such as hull doublers at the front beams being omitted, 3ply was also used instead of 4ply for the decks with the 3ply having a 50gsm glass coat on the under side of the deck to aid with strength.

Subsequently the boat ended up 6kgs under-weight shocked


Jim Sage purchased the boat and rebuilt it to take a sloop rig setup. Kevlar was added to the inner hulls for ~600mm either side of the front beam to assist with the additional load of the sloop bridle.
Other areas were also strengthened to for the riggers of 2up sailing.
Jim's 'strengthening' added a few extra kilos bringing the boats weight to 56kgs when completed...... he also re-named the boat
Jurassic Karp
cool


Matt Kirby purchased it in ~2003 from the 3rd owner (unknown) and a 2nd rebuild was done in 2005 which included poorly done previous repairs being re-done, carpeted centreboard slots with aero foiled shaped hulls along with a hobie style trampoline & a complete re-paint with graffics added, the main change was the addition of a spinnaker setup
smirk

Matt competed in 3 national, 5 state, 2 F16 titles with Jurassic Karp.


Matt under spinnaker power @ WYC

[Linked Image]


[Linked Image]


I purchased the boat from Matt a month ago..... why ????
Jurassic = old
Karp = pest
and that's me...... an old pest laugh


the story is about to start .....


Yar, & this ere post be done without a sin'le drop o' rum passin' me lips

Kingy
started with Impara Cadet #3 / Mosquito #245
& now Mosquitos #1182 & #1740

-- Have You Seen This? --
Re: 1740 [Re: Pirate] #259960
06/02/13 07:58 AM
06/02/13 07:58 AM
Joined: Apr 2013
Posts: 858
Victoria Australia
Pirate Offline OP
old hand
Pirate  Offline OP
old hand

Joined: Apr 2013
Posts: 858
Victoria Australia
Rigging:

Side stays fitted with Ronstan fine adjustment

3 front stays.....
a/ split stay setup for cat rigged
b/ sloop stay and bridle
c/ cat rig with spinnaker single stay and bridle to suit

1 pair of Dyneema adjustable length trap wires
2 pairs of 2mm wire and loops

Ronstan 'Orbit Block' 7:1 mainsheet system

clip-on jib blocks and sheets

Ronstan 40mm ratchet blocks with 6mm sheet.

Boyer blades with EDPM covers

Stainless steel rudder stocks

Glass coated cedar centreboards.


Sails:

Ashby Main with fibrefoam batterns (circa 2006)

Goodall Main (circa 2002)

Horizon Jib

Irwin Spinnaker (circa 2007)


Spars:

Anodised mast with spanner rotation setup
8:1 external haul down system
spinnaker hound loop and "on water" adjustable diamond tensioners with a fixed spreader.

Alloy square section boom with 4wheel car out-haul
spare 2 arrow mast type boom

Carbon-fibre spinnaker pole with internal halyard, tack and control blocks
Blade 16 fibreglass/graphite spinnaker mouth with trampoline material as the spinnaker chute.


Other stuff:

lightweight & well balanced galvinised registered trailer

fibreglass sailbox

barrel beach rollers

Mosquito tuning manual

Mosquito assoc plans with additional building instructions wink


smile


Yar, & this ere post be done without a sin'le drop o' rum passin' me lips

Kingy
started with Impara Cadet #3 / Mosquito #245
& now Mosquitos #1182 & #1740

Re: 1740 [Re: Pirate] #259961
06/02/13 08:52 AM
06/02/13 08:52 AM
Joined: Apr 2013
Posts: 858
Victoria Australia
Pirate Offline OP
old hand
Pirate  Offline OP
old hand

Joined: Apr 2013
Posts: 858
Victoria Australia
So whats this all about then you may ask.......

well the next pic will tell a thousand stories, and this is where my part of Jurassic Karp's history starts.

The Idea is to show what can be done and allow future owners / sailors an insight to this particular cat.


The down right ugly:


starboard hull crack eek

[Linked Image]


For those that bothered to read the first post, you'll recall that the original build did not have hull doublers fitted and that a 2nd re-build saw Kevlar added to strengthen up the area around the front beam..... and that a jib was added and subsequently a spinnaker as well, all placing additional load onto the area

So why did did it crack ????? obvious you may think.....
Have another look at the photo wink

the crack is opening at the beam connection area and although the pic isn't that clear the hull is actually being compressed
to the point where it has bulged out slightly at the bottom of the crack....

so how can the load of sailing cause the crack when all the load on the hull is inwards and upwards when sailing, yet this crack says its trying to go out and down.....


the real cause of the stress fracture is "resonant frequency"


A poor trailer design has allowed the hulls to whip up and down during transportation, up to 4" of twist can be seen when towing the boat..... hit a pothole in the road when the hull is flexing downwards and the stress becomes too much....

want to prove it to yourself ?

tear a sheet of paper in half, the inital tear point is the deck line, the bottom part of the sheet of paper will bulge out slightly as you begin the tear, the middle of the sheet where you are tearing it is going up and the ends are going down..... the dead opposite load to "under sail conditions" where the loads are all in the opposite direction


This is proven by the opposite side hull, well actually the front beam near where it joins the port hull, the beam itself has a tension crack across the top edge.... so if sailing was the cause then the crack would be on the bottom of the beam or it would be a compression crack on the top of the beam instead of a tension crack
This crack in the beam is exactly halfway between the hull and the support that holds the front beam when its being trailered around
(pic to come)


When I removed the front and rear beams the rivets that hold the dolphin striker to the bottom edge of the main beam were highly polished, suggesting movement all be it a small amount, further more the vibrations of being transported has flogged out the dolphin striker tensioner.....

all this from a bad trailer carrying setup, and for those wondering what it is.....
the boat is only held by the front and rear beams, 2 mounting locators cradle the front beam, 1 locator in the middle of the rear beam is all that holds the back half of the boat

the front beam instantly becomes the leverage point while the rear mount becomes the hinge, hey presto, one stress fracture


So the repair.....

I've spoken to several known and indeed unknown boat builders on how to tackle the issue, a plan was thought out and with a modification or two we have the best solution and repair method we collectively could design.....


now before everyone starts on how to fix it, your too late cry

The first stage of glassing was completed tonight.....


relax.... there's more pics to come as the process goes on

now where did I put that RUM
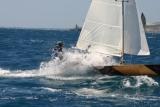
crazy


Yar, & this ere post be done without a sin'le drop o' rum passin' me lips

Kingy
started with Impara Cadet #3 / Mosquito #245
& now Mosquitos #1182 & #1740

Re: 1740 [Re: Pirate] #260139
06/07/13 09:56 PM
06/07/13 09:56 PM
Joined: Apr 2013
Posts: 858
Victoria Australia
Pirate Offline OP
old hand
Pirate  Offline OP
old hand

Joined: Apr 2013
Posts: 858
Victoria Australia
Pic taken prior to teardown.....

you can see how one side of the boat is cradled on the front beam in this pic....
its duplicated on the port hull....

[Linked Image]


Yar, & this ere post be done without a sin'le drop o' rum passin' me lips

Kingy
started with Impara Cadet #3 / Mosquito #245
& now Mosquitos #1182 & #1740

Re: 1740 [Re: Pirate] #260140
06/07/13 10:01 PM
06/07/13 10:01 PM
Joined: Apr 2013
Posts: 858
Victoria Australia
Pirate Offline OP
old hand
Pirate  Offline OP
old hand

Joined: Apr 2013
Posts: 858
Victoria Australia
front beam crack, port hull ..... as promised cool

this crack is a tension crack not a compression crack


notice where the crack is in relation to the hull and trailer support.... almost exactly in the middle
wink
[Linked Image]

closeup of the cracked beam

[Linked Image]


Yar, & this ere post be done without a sin'le drop o' rum passin' me lips

Kingy
started with Impara Cadet #3 / Mosquito #245
& now Mosquitos #1182 & #1740

Re: 1740 [Re: Pirate] #260141
06/07/13 10:20 PM
06/07/13 10:20 PM
Joined: Apr 2013
Posts: 858
Victoria Australia
Pirate Offline OP
old hand
Pirate  Offline OP
old hand

Joined: Apr 2013
Posts: 858
Victoria Australia
time for some open heart surgery cry

and if one hull needs to be repaired then I'll have to "fix" the other one aswell
smirk

you can see dayligt coming through the crack aswell


[Linked Image]

NB:
5 stringers under the main deck...... confused


Yar, & this ere post be done without a sin'le drop o' rum passin' me lips

Kingy
started with Impara Cadet #3 / Mosquito #245
& now Mosquitos #1182 & #1740

Re: 1740 [Re: Pirate] #260142
06/07/13 10:26 PM
06/07/13 10:26 PM
Joined: Apr 2013
Posts: 858
Victoria Australia
Pirate Offline OP
old hand
Pirate  Offline OP
old hand

Joined: Apr 2013
Posts: 858
Victoria Australia
close up shot.....

[Linked Image]

note where the kevlar finishes...... and the original 260gsm glass tape finishes on the two plates....
and can you see the area thats not been glassed at all, yup right along the crack

better pic to come of that issue
wink


Yar, & this ere post be done without a sin'le drop o' rum passin' me lips

Kingy
started with Impara Cadet #3 / Mosquito #245
& now Mosquitos #1182 & #1740

Re: 1740 [Re: Pirate] #260143
06/07/13 10:37 PM
06/07/13 10:37 PM
Joined: Apr 2013
Posts: 858
Victoria Australia
Pirate Offline OP
old hand
Pirate  Offline OP
old hand

Joined: Apr 2013
Posts: 858
Victoria Australia
This is the port hull

this pic shows how the timber ply was left un-glassed and without the additional kevlar layer. the starboard hull is identicle except its cracked, so it would only have been a question of time before this hull failed aswell
cry

[Linked Image]


Yar, & this ere post be done without a sin'le drop o' rum passin' me lips

Kingy
started with Impara Cadet #3 / Mosquito #245
& now Mosquitos #1182 & #1740

Re: 1740 [Re: Pirate] #260144
06/07/13 10:48 PM
06/07/13 10:48 PM
Joined: Apr 2013
Posts: 858
Victoria Australia
Pirate Offline OP
old hand
Pirate  Offline OP
old hand

Joined: Apr 2013
Posts: 858
Victoria Australia
repair time......

now as much as I'm not a fan of those TV advertised "special tools, but wait there's more" adds, I have to sadly admit defeat to the "renovator", I simply couldnt have done these cuts without it.
Gladly I borrowed this unit so its cost me SFA and thats a good thing
grin

[Linked Image]

My 3ply hull doubler sitting roughly in position wink
the 2 plates have had ~8mm removed from them, this will allow me enough room to fit the additional stiffners that I'm fitting (actually allready done but I wont rush you wink )


112 views and not a single comment..... mental note to self, must be doing it right ....
[Linked Image]


Yar, & this ere post be done without a sin'le drop o' rum passin' me lips

Kingy
started with Impara Cadet #3 / Mosquito #245
& now Mosquitos #1182 & #1740

Re: 1740 [Re: Pirate] #260147
06/08/13 12:53 AM
06/08/13 12:53 AM
Joined: Apr 2013
Posts: 858
Victoria Australia
Pirate Offline OP
old hand
Pirate  Offline OP
old hand

Joined: Apr 2013
Posts: 858
Victoria Australia
Port hull:
this hull isnt cracked but in this pic you can see the potential for the damage we have on the other hull.
The depressed area at the beam mount is clearly showing signs of the disaster that was going to happen had I left this un-attended....

[Linked Image]


Yar, & this ere post be done without a sin'le drop o' rum passin' me lips

Kingy
started with Impara Cadet #3 / Mosquito #245
& now Mosquitos #1182 & #1740

Re: 1740 [Re: Pirate] #260158
06/08/13 09:28 PM
06/08/13 09:28 PM
Joined: Oct 2010
Posts: 92
South Oz
Phillip Offline
journeyman
Phillip  Offline
journeyman

Joined: Oct 2010
Posts: 92
South Oz
Great post, keep it going.
Another area of failure with this generation of hulls was the centre decks. They failed over time because the (5) stringers were inserted directly into the top of the foam sub-frames. They could not carry point loading of a knee, or high impact, coming in of the wire with gusto. A picture suggests the centre deck has been removed, and failure is evident. Suggestion: upgrade the deck support method whilst its off. See a previous post by Simon Hallsworth who successfully made this upgrade on a sister boat last winter.
Also he has info on face book. Contact him for info. I can supply some also. Send a PM.
http://www.catsailor.com/forums/ubbthreads.php?ubb=showflat&Number=246814&page=1
http://www.catsailor.com/forums/ubbthreads.php?ubb=showflat&Number=246814&page=2

Last edited by Phillip; 06/08/13 09:42 PM.

Tortured ply is clearly beautiful.
Mozzie Aldebaran VI
1827
Re: 1740 [Re: Phillip] #260159
06/09/13 01:47 AM
06/09/13 01:47 AM
Joined: Apr 2013
Posts: 858
Victoria Australia
Pirate Offline OP
old hand
Pirate  Offline OP
old hand

Joined: Apr 2013
Posts: 858
Victoria Australia
Originally Posted by Phillip
Great post, keep it going.

I intend to wink
was beginning to wonder if anybody was actually reading it blush


Originally Posted by Phillip
Another area of failure with this generation of hulls was the centre decks. They failed over time because the (5) stringers were inserted directly into the top of the foam sub-frames.


Glad someone's onto it grin
The starboard hull main dech has a soft spot..... right about where my boney butt resides grin

I also posted earlier about the 5 stringers in the starboard hull...... the port hull only has 3 stringers under the main deck crazy
Starboard hull stringers (5 off) are 12mm x 8mm whilst the port hull's stringers (3 off) are 16mm x 12mm, the last owner (Matt) did replace one deck but he's forgotted as to which one, I'm guessing its the port hull as the internal work is much "fresher" in comparision.

Plan at this stage is one of three choices .....

1/ replace the stringers in both hulls with 16mm x 12mm and splash some extra glass over them to aid the foam sub-frames....

2/ make from 3mm ply a 'plate' that runs verticly from hull side to hull side and glass that onto the foam, then cut the top to the deck curve and rebate it aswell for the stringers..... this plate would only be 75mm deep

3/ full "I" beam the main deck..... cut the damaged foam so that its straight from gunwale to gunwale, slide in a 3ply crossmember (~40mm in width), cut a verticle 3ply and shape one side to profile the deck and glass in.... cut stringer slots and fit stringers, then lay a 3rd strip of ply over the verticles.


Option 1.... simple, straight foward quick and easy. Prone to failure eventually is the main drawback.... dont want to do this again mad
Option 2.... little bit longer in the repair side of things but should outlast the rest of the boat cool
option 3.... super strong, it really doesnt need the stringers fitted at all, bloody slow process to make all the "i" beams and fit them tho, and the biggest plus is that both sides of the hull are tied together through the "I" beam, thus strengthening the area along the tramp line
wink

I have 8 lengths of 16mm x 12mm stringers all ready cut, if I go with option 2 I belive I can drop it to 4 stringers per deck, remembering that the deck with 5 has failed and the deck with 3 is fine....

The internal part of the crack repair at this stage is completed with pics to follow shortly, the undamaged hull has also had the same re-inforcing plates added and is also completed..... work on the main deck starts tommorow


Thanks for the links too......

Kingy


Last edited by Pirate; 06/09/13 01:52 AM.

Yar, & this ere post be done without a sin'le drop o' rum passin' me lips

Kingy
started with Impara Cadet #3 / Mosquito #245
& now Mosquitos #1182 & #1740

Re: 1740 [Re: Pirate] #260161
06/09/13 05:55 AM
06/09/13 05:55 AM
Joined: Oct 2010
Posts: 92
South Oz
Phillip Offline
journeyman
Phillip  Offline
journeyman

Joined: Oct 2010
Posts: 92
South Oz
I used option 3 on Aldebaran V, 1995. No stringers, never had a problem.
Your option 3; 'new' top of foam must have a capping so the 'I' beam edge does not cut down into the foam. I used 3mm ply but glass resined onto the foam may also work. If you have the WRC stringers already, may be OK but is it necessary to have the 'I' beam full height? Why not have them (the stringer width of) 16mm lower and sit them ontop of the 'I' beam. Glue them onto the 'I' beam (during the application of the glass fabric), glue the stringers onto the 'I' beam, glue the deck onto the stringers, stringers will not move once the deck glue has grip of them also.
Hint, to shape the top of the 'I' beam:
1. cut to length (int. width of hull)
2. place a piece of 16mm timber ontop of the 'new' foam top
3. place the 'I' beam in position ontop of it
4. scribe the deck curvature onto it using a concaved deck curve template spanning across the gunwales
5. remove 'I' beam and cut to scribed line
6. remove 16mm spacer piece, glass, fit and glue shaped 'I' beam. (Devise a method to hold them vertical.)
7. glue stringers onto it.
This method will not need the tops of the 'I' beams to be shaped after fitting. The glued stringers will need only minimal truing.
Step 6 can be left until all items prepared and the gluing done in one application. Label parts for correct location when experiencing "gluing stress".
NB: ensure the new deck has 2 layers of epoxy applied to the under surface, 1st allowed to gel, 2nd applied during fitting.
Ensure the tops of the stringers are precoated also or they will 'suck' the glue mixture dry and weaken the glue bond.
Trust I am not teaching to 'suck eggs'.
Good luck with it all.

Last edited by Phillip; 06/09/13 05:58 AM.

Tortured ply is clearly beautiful.
Mozzie Aldebaran VI
1827
Re: 1740 [Re: Phillip] #260167
06/09/13 07:03 PM
06/09/13 07:03 PM
Joined: Apr 2013
Posts: 858
Victoria Australia
Pirate Offline OP
old hand
Pirate  Offline OP
old hand

Joined: Apr 2013
Posts: 858
Victoria Australia
Its not quite decision day yet but its fast approaching as to what I system I choose.

I like the "I" beam the most but the time taken to manafacture the components alone is well out there, even with my $40 band saw (god I love facebook buy/sell sites grin) it will be a slow process.

the 2nd option I listed is quicker and far lass complicated, single 3inch wide strip cut to the width of the hull and with one side cut to the deck curve and 4 slots to take the stringers, by gluing them onto the side of the foam subframes they would have enough surface area inwhich to spread the load out evenly through the foam....
A 2nd strip could if warranted be placed on the top of the foam to for a "T" .... not as strong as te I beam but certainly a lot quicker.

I hadn't thought of your idea of lowering the "I" beams down the 16mm and then setting the stringers onto them ...
certainly a very strong system
cool

mmmmmmm more food for thought
cry


Yar, & this ere post be done without a sin'le drop o' rum passin' me lips

Kingy
started with Impara Cadet #3 / Mosquito #245
& now Mosquitos #1182 & #1740

Re: 1740 [Re: Pirate] #260168
06/09/13 07:14 PM
06/09/13 07:14 PM
Joined: Apr 2013
Posts: 858
Victoria Australia
Pirate Offline OP
old hand
Pirate  Offline OP
old hand

Joined: Apr 2013
Posts: 858
Victoria Australia
port hull

[Linked Image]

pic shows the doubler plate installed (about a week ago) and a 2nd stiffner plate having just been fitted, the masking tape is covering small wood wedges that are holding the plate tightly against the doubler plate.
The masking tape is easier to remove if a bit of resin gets hold of it compared to an uncovered wedge being glued to the subframes or plate...

The stiffner plate is there to add additional strength to the compromised hull.
Put simply.... if I cut and scarf in a new section where the actual hull crack is I'm weakening a failed area even more, so the crack is best left well alone other than a slight scarfing and glassing, the stiffner plate is really now the outer hull but just located a bit further internally wink


Yar, & this ere post be done without a sin'le drop o' rum passin' me lips

Kingy
started with Impara Cadet #3 / Mosquito #245
& now Mosquitos #1182 & #1740

Re: 1740 [Re: Pirate] #260169
06/09/13 07:19 PM
06/09/13 07:19 PM
Joined: Apr 2013
Posts: 858
Victoria Australia
Pirate Offline OP
old hand
Pirate  Offline OP
old hand

Joined: Apr 2013
Posts: 858
Victoria Australia
starboard hull

[Linked Image]

doubler plate and stiffner glued in place, 'scratched up' ready to be glassed in
cool


Yar, & this ere post be done without a sin'le drop o' rum passin' me lips

Kingy
started with Impara Cadet #3 / Mosquito #245
& now Mosquitos #1182 & #1740

Re: 1740 [Re: Pirate] #260170
06/09/13 07:37 PM
06/09/13 07:37 PM
Joined: Apr 2013
Posts: 858
Victoria Australia
Pirate Offline OP
old hand
Pirate  Offline OP
old hand

Joined: Apr 2013
Posts: 858
Victoria Australia
starboard hull

[Linked Image]

260gsm cloth laid in place and ready for gluing
The cloth is ~25mm larger than the doubler plate, this should well and truely tie it all together
wink

3 other strips will be fitted as the resin is applied....

1 will run between the 2 timber sub frames and will run the full depth of the hull

the other 2 will cover the subframe plates and outwards over the stiffner plate, this will tie the subframe plates back to the way it was.


Yar, & this ere post be done without a sin'le drop o' rum passin' me lips

Kingy
started with Impara Cadet #3 / Mosquito #245
& now Mosquitos #1182 & #1740

Re: 1740 [Re: Pirate] #260171
06/09/13 07:40 PM
06/09/13 07:40 PM
Joined: Apr 2013
Posts: 858
Victoria Australia
Pirate Offline OP
old hand
Pirate  Offline OP
old hand

Joined: Apr 2013
Posts: 858
Victoria Australia
and hey presto.....

the completed product grin


port hull
[Linked Image]


Yar, & this ere post be done without a sin'le drop o' rum passin' me lips

Kingy
started with Impara Cadet #3 / Mosquito #245
& now Mosquitos #1182 & #1740

Re: 1740 [Re: Pirate] #260172
06/09/13 07:45 PM
06/09/13 07:45 PM
Joined: Apr 2013
Posts: 858
Victoria Australia
Pirate Offline OP
old hand
Pirate  Offline OP
old hand

Joined: Apr 2013
Posts: 858
Victoria Australia
starboard hull

[Linked Image]

chopped glass mat was added to the subframe/stiffner conection where there was a gap.
it shows as an off white haze in the pic.

this was taken shortly after the resing had been applied and it was still tacky when I snapped this shot
wink


Yar, & this ere post be done without a sin'le drop o' rum passin' me lips

Kingy
started with Impara Cadet #3 / Mosquito #245
& now Mosquitos #1182 & #1740

Re: 1740 [Re: Pirate] #260177
06/10/13 05:23 AM
06/10/13 05:23 AM
Joined: Oct 2010
Posts: 92
South Oz
Phillip Offline
journeyman
Phillip  Offline
journeyman

Joined: Oct 2010
Posts: 92
South Oz
I'm impressed!
Looks like how it should have from day 1.
Are the beam attachment nuts captive under the beam box?
If not, glue foam between the two frame, X mm below the beam box so if the nuts are dropped during assembly, they do not fall all the way down to the keel and then cannot be recovered.


Tortured ply is clearly beautiful.
Mozzie Aldebaran VI
1827
Page 1 of 6 1 2 3 4 5 6

Moderated by  Damon Linkous 

Search

Who's Online Now
0 registered members (), 487 guests, and 90 spiders.
Key: Admin, Global Mod, Mod
Newest Members
Darryl, zorro, CraigJ, PaulEddo2, AUS180
8150 Registered Users
Top Posters(30 Days)
Forum Statistics
Forums26
Topics22,405
Posts267,056
Members8,150
Most Online2,167
Dec 19th, 2022
--Advertisement--
Powered by UBB.threads™ PHP Forum Software 7.7.1