Hulls, of course, are the same length for both A-Class and 18-squares, and in my file I found that plans for building A-class hulls are available from Gougeon Brothers in Bay City, Michigan and also from Greg Goodall in Australia.
Very few 18 sq have been built in the last 10 years. The ones that have been built, have been very very fast. They have about the same upwind and downwind speed (hullspeed).
Keep in mind these boats are top quality with carbon or carbon wood hulls; carbon mast and beams; top quality rudders and boards and custom sails.
There was or is a fleet of 18-squares in North Carolina. If you want a couple of contacts, e-mail me. Maybe somebody there has plans or knows where to get them.
Re: 18 Sq plans
[Re: Mary]
#28031 01/23/0411:14 AM01/23/0411:14 AM
When I spoke to him, he spoke of the 18sq days in the past tense as in "we used to sail boats called 18 squares because they had 18 square meters of sail."
I inferred that this meant he no longer participated. Glad to see I was wrong.
Plans are available (I think) through Gougeon Brothers plan service, but hull is really an "A" Boat design - and needs a bit more displacement to support wider beam and bigger rig. John Lindahl lives in Fennville Michigan and you can probably do a search and contact him directly. Denis Palin from Houston Texas is another who had recently build an 18 Square. Bobby Bergstedt in New Jersey might still have contact with Brad Johannson who was also a custom builder. NACRA ended 18 Square production in the late 1980's - early 1990's due to slow sales and an influx of "custom" boats. Originally they were SolCat hulls, then they moved to the 5.2 hulls at 10 feet of beam, and as the class grew, the Roland Brothers started building their own hulls called NACRA which eventually were bought out by Performance Catamarans (Frank Butler). Class sails were made by Skip Elliott, Henry Bossett and Randy Smyth - with a few home-growns ones included. Coyote molds were purchased and produced for a short period of time in Texas by Chris Kilbourn (last phone number I have for him is 214-224-8441 - work number). Not sure what he did with the molds. Gino Morelli and a few other west coast sailors did some one-off's back in the early 1980's - but never knew if they kept the molds or not.
The 18 Square IS NOT a 5.5 - or a 5.8 set of hulls.
They are specifically designed 18 foot long and the beams started at 10 feet and grew to 13 feet, then settled back at 11-12 feet. Masts were usually 30-32 feet and mainsail was 18 sq. meters or about 194 square feet. Weight of boats ran from ultra-light 260 lbs. up to about 400 for glass production boats. Class had Category 1 and 2 and raced together. Solid Wing sails were allowed and WILD TURKEY owned by Craig Riley of Calfornia was our class "poster boat". Lack of new builders also contributed to the decline of the class. Boats were either taken apart or tilted for trailering. Large fleets were located in the North East, Michigan, Virginia, Florida, Texas and California. A few others were scattered around the country - Tennessee, Carolinas, and even South Dakota ! There was also a bit of 18 Square activity in Australia and in Europe for a time. Germany, specifically, had a group of Squares as did the U.K.
As former Class Secretary I welcome any questions.
REALLY a good definitive post on the 18 SQ .thanks DL saving that one. Would reiterate contacting John L ON THE HULL DESIGN and const. techniques and numerous aspects of any 18 sq project any sailor wanted to build or undertake. With 194 sq ft on taller mast section and the carrying power and resulting forces of added beam it takes more hull volume forward to counteract the greater sail forces produced . An A Class type hull would generally become overpowered in the upper wind range and tend to drive its bow down and into waves. John's LDC design and the Coyote 18 sqs had very flat full hull sections and plenty of volume forward for good reason . One problem they had with 10 or 11 ft beam was the boats tacked so fast they could never get across quickly enough. Followed John's development over a few years of building them , He tried a taller mast and sail in earlier years before winning the 18 sq Nationals finally . The taller mast he found was not ideal in gusting conditions were others with closer to 30 ft masts excellerated through gusts while he was up and down too often , beam was increased in earlier years also ,but found the boat designs that flew a hull earlier with less beam were faster , It was really a trial and error process in finding the right combination of beam mast sail componants to work together for average targeted wind speeds. John said that the biggest change since he was active in the A Class and 18sq is not hull building technique ,but all the great lightweight hardware and rigging componants that are available now. The CF masts and sail materials have improved as well . John developed a combination alum and top portion C F mast , a great innovation back then for the class.
Steve -recall your a larger sailor 220 plus ,like me ,so an A Class cat is not ideal ,-Interestingly John and others started in A Class cats then moved to the 18 sqs , they liked the unlimited beam aspect and thought the 18 sq formula had a wider appeal to a variety of sailors light or heavy. There are however very few 18 sq s being actively raced ,though a great singlehanded class concept.
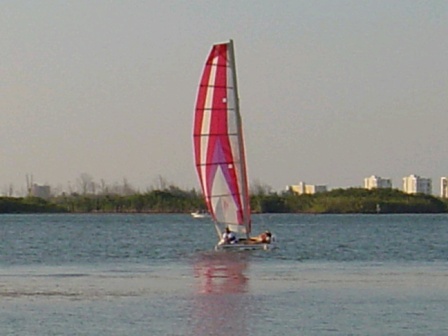
Got a feeling I probably know you sail6000 ! Might want to compare this attachment with the one form my earlier post. The one in above post is a "stock" NACRA 18 Square.
This attachment is one of the Category 1 boats built by Brad Johanson.
Identified in the photo - At the bow = Fred Lemke (Then Michigan - Now Wisconsin) At the stern left to right: ...Duane McDaniels (Pontiac Michigan) ...Chris Cordes (Jacksonville Florida) ...Bobby Bergsted (Toms River New Jersey - and the "pilot" of this square
I think I have a set of line drawings at home that I will post later. One is the NACRA and the other is the COYOTE.
A look (attachment) of the deck of the Johanson boat. Note circular plywood plate for mast rotation, and also the steped, secondary tramp with curved traveller. Red & White stripe hulls peeking upper left is bow of Johns "old" 18 Square.
Thanks again for all the interesting posts and pics . A poster above -Kantz- mentioned me in a post so thought I should respond with added insights for Steve . You can click on a posters forum name and see their bio ,many inc their names etc etc . You can also send a private e -mail to another via forum ,-its a nice feature here as well ,-
Good to hear from you, pretty cold out there today ,just goofing off at work here on a TGIF afternoon, dreaming about sailing and racing ,as usual.
You know Claude? He's my bud. I'm going to tell him you said he was old. Actually, he has Dennis' old 18SQ that Dennis built and he (Claude) still races every year at CatFest.
There is an 18sq Fleet at the Lake Norman Yacht Club near Charlotte, NC. They have 10-15 boats. They usually only have 4-6 racing. They used to travel to Regattas, but they quit several years ago. That is why I got rid of my 18sq. The boats are all Nacras. They have all three different 5.5 hull constructions represented(stringer hulls, foam hulls, long tramp hulls). Nacra made 18sqs from their standard 5.5 uni hulls, or vice-versa(their website says so). The uni hulls have the bridle tangs on the outside of the bows. I have never heard of a third category. The portsmouth only has 2 listed.
You could build a Category 1(light) 18sq with A Class hulls. An F18HT could be converted to an 18sq.
This is another Class with no Class Association and unknown, missing Class rules.
It is a great sailing boat. When you are on the wire the visibility is terrific. The width makes it very resistant to flipping when hit by puffs. I trailered mine disassembled. I could assemble it alone, and be in the water, in less than an hour.
I have always wondered how they managed the wing sails. I would surely be afraid that a capsize would damage the wing. Also, if it was parked on the beach with the wing up, did the owner get any sleep at all ? I would be very afraid that a gust would hit the boat and capzise/damage it. Raising/lowering the wing every time like the C class ?
WOW !! ask a question and get a bunch of info. I love this site.
Carl, its good to see that your still alive and kicking.
TO all that has posted above thank you also.
Recently, my family has been struck with some medical issues and I have been thinking about a project to work on with my father. My grandmother just succumb to pancreatic cancer and my mother has bone cancer. Her prognosis is not good and she has requested that I spend quality time with my father. What better way than to build a boat??
My concept was to take and build an all carbon (or as close as I can) 18 sq with some rig mods (Carl, you'll love this-- a snuffer and spinnaker. Much like the insane stuff we did in the first of the 90's worrell's too much sail and hang on)
I have just realized that I no longer want to worry about crew and training them but yet still have the urge to go insanely fast with the occasional fear that I may be going to fast for my own physical good. Remember that I learned how to sudden stop a boat going 25+ knots a few years back with just a small amount of damage to the calcium deposits in my body (bones).
I also thought that there maybe just a few more truly nutso people out there (like me) that may get a kick out of a boat like it so..........
Any thoughts??
Steve
Last edited by majsteve; 01/24/0410:47 AM.
Re: 18 Sq plans
[Re: Tracie]
#28044 01/24/0410:55 AM01/24/0410:55 AM
There are Lindahl plans available, and there is a guy named Dennis Palin who might be able to help you - Dennis built an ABSOLUTELY gorgeous, fast, Sq, but I think he rather designed it himself. His addy is dpalin@ev1.net
sea ya tami ps. The NACRA 18sq is not onedesign, either. The newer models have the 31' mast with laminate higher-aspect sails, the older ones have 30' mast and lower-aspect Dacron sails. Good luck with your endeavour and Welcome To Squaredom. I absolutely love mine!
I met him once at his house here in Cary. At the time we were discussing hiring a coach for our sailing team, but then a nationally ranked laser sailor decided to join the team and, well, we didn't need a coach after that
Definitely a nice guy though. Tell him, that if he remembers me, that I said hi. -Tad
I have always wondered how they managed the wing sails. I would surely be afraid that a capsize would damage the wing. Also, if it was parked on the beach with the wing up, did the owner get any sleep at all ? I would be very afraid that a gust would hit the boat and capzise/damage it. Raising/lowering the wing every time like the C class ?
The "wing boat" never (to anyone's memory) came close to tipping over. While the softsail boat masts ranged in the 30-32 foot length, the wing was right around 28 feet. Also with the controls, Craig could "power up or down" simply by changing the camber in the wing. Given the platform weighed less than 300 lbs. the wind forces simply were translated in forward speed.
Between races at regatta the wing was allowed to swing free. Since it is symetrical, equal pressure on both sides, so no violent thrashing about like a soft sail. Remember, the thrashing on your softsail takes place because the wind is on one side, then the other causing camber to flop back and forth!
In the evenings, the boat was simply laid on it's side with sail tip on an old (ugly green vinyl) kitchen chair. If weather report indicated bad weather or rain, the sail was just detached from the platform and stored in the covered trailer used to haul wing, hulls, etc.
The Square - both wing and softsail "loves" to park between races. Travel out, sheet in and push tiller away. The boat just sits there. When ready to bail out to start, simply pull tiller towards yoou, the bows swing away from the wind, and sheet traveller in. While parked, it was an enjoyable platform to sit on between races. No banging around on the waves, no flapping jib or main, and no bouncing around with the hulls. Until you have sat on a wide platform, it is hard to describe.
Steve, As Tami suggested it could very well be worth your while to talk to Dennis Palin. He did design his own square. He built it from 3mm okume ply sheathed in 4.7 oz carbon. I suppose you could call it a carbon hull , with a ply core instead of foam. Carbon beam and even a carbon striker.
I think the hulls came out at 52lbs each and very strong.
Dennis was good enought to allow me to post some construction pics and of course a couple of shots of the finished craft on my web site. There is a pic of Dennis's creation in the attachment.
Good luck. I hope you build one.
Regards, Phill
I know that the voices in my head aint real, but they have some pretty good ideas. There is no such thing as a quick fix and I've never had free lunch!
I have one of the few 18 square Coyote catamarans. Recent posts about the squares motived me to try to chase down Chris Kilbourn who was the last person known to build one. I finally found him and he indicated that he has one and it is questionable if any more that exist other than his and mine. Contrary to earlier posts, the tooling still exists in Traverse City, Michigan and additional hulls could be built. I have yet to have mine long enough to assemble it but when I do I will post pictures.
Hi Steve ,-glad to hear your still kickin too - sorry to hear about fam. health related difficulties.
Do like the concept ,--an 18 sq with spin snuffer . New single handed spin class !! It may be a great way to get this class going again ,-it would bring a number of old 189 sqs out and prompt some new ones as well .
John l hulls weighed 30 lbs ea. boat weights could be under 200 inc spin etc , with 193 sq ft mains ,-roughly similar to 18 hts ,but having 10 or 12 ft or unlimited beam as 18 sq rules outlined gives the ability for one to hold it down and really create some extreme potential boat speeds .
Do have some basic concepts for such a design , think experimentation would be the really fun aspect of this type of design and development class . A more extreme canted planning hull with an added set of forward molded in forward foils to balance the spin , with a spin set on extented pole to provide luff angle and use the huge lift a spin can generate would see this type moving at speeds beyond the 18 planning skiffs. The exact shape,- area ,-and angle of the forward foils for cats requires some refinment ,but working models on the 60 tris and other experimental sailing craft provide good basic parameters .
fun stuff -
Re: WOW- an 18 sq with spin design ,--
[Re: sail6000]
#28057 01/26/0403:20 PM01/26/0403:20 PM
Do like the concept ,--an 18 sq with spin snuffer . New single handed spin class !! It may be a great way to get this class going again ,-it would bring a number of old 18 sqs out and prompt some new ones as well .
Carl -
Problem with the old Squares, is the bow and hulls forward of the front beam are not structual to carry spinnaker loads. That is wy they all used very short pig-tails and long forestays to the boaw of each hull. The loading was designed to resist up and down flex - not in and out that a spinnaker might cause.
The old glass hulls only had half a cardboard tube glassed in place along the sides of the hull. (Another reason for oil-canning) When trapping against the side of the hull - always keep your feet at the top of the hull so you don't end up wearing a hull as a pair of boots!
The older aluminum mast was the 5.2 profile extruded to the 30 feet length, and modified with add on to 31-32 feet. I still have my 1983 boat and for a 20 year old still looks great. But - I wouldn't try to add on the spinnaker using the production hulls and the lightweight mast section.
This means having to buy/build and invest in a new set of hulls and a good carbon mast designed for a boat to carry a spinnaker. A big investment for a class that eventually refused to tear-down and travel.
Now - if one were to take a set of Formula hulls, and just convince Performance Cat to extrude longer cross beams, and purchase a longer traveller from Harken, then that might be a better way to go - plus the newer cat hulls are optimized for speed compared to the older Square hulls.
Regardless - if someone wants to schedule a SQUARE MEETING here in midwest, I'd travel for a 3 day event. Plan to get back on the water this summer and shake out cob-webs - but an "A" Class boat is also being considered.
Cheers
Re: WOW- an 18 sq with spin design ,--
[Re: Mary]
#28059 01/26/0406:21 PM01/26/0406:21 PM
Think the benifits of canted hulls outweigh the disadvantages ,but with proper coresponding design applied. Some would disagree ,it depends on what the design wishes to accomplish and the windspeeds it may be targeting to be sailed in .Some believe cats are already so fast that waves and sea conditions are the limiting factor at top speeds ,so the focus is on better light wind performance . Some think faster is more fun and would give up some light wind speed for greater top speed or planning capability.
Recall some posts by noted boat builders that stated the canted hull versions of the same designs were faster, though this most likely at higher speeds . Also we see most development classes going to canted hulls in search of more speed,-A class cats per example ,-also the most successfull current design firms using canted hulls is another indicator,-and the Inter line most notabley in production cats having canted hulls. Some of the C Class designs also use canted hulls ,-state of the art designs with solid wingsails. There are advantages and disadvantages to both types of hull design -canted and non canted.The case can be made equally for either type.
Most of the time cats are sailed heeled to leeward ,-hulls never go through the water perfectly level, paralell, or without sail forces acting on them creating heel and bow down forces as well as a high pressure side , just as boards and foils have. The ideal attitude and fastest a cat is sailed is with one hull just skimming the surface ,this reduces both types of resistance and drag on hulls ,one being form drag {general shape of hull}that causes resistance , the other frictional resistance {surface area} causing drag, frictional resistance the larger factor in light winds . One hull in the water with crew on the wire, windward hull flying just above the surface waves of course is where both forms of resistance are greatly reduced and the biggest jump in boat speed occurs. Any that have raced in open fleets with monohulls and evan trimarans will notice this is where beach cats come alive and really leave other sailing craft behind. Evan in light winds the crew should get forward and to leeward which heels the boat and increases boat speed by lifting the windward hull and effecting sails.
Design of catamarans is an intricate mix of practical engineering ,structural considerations, and art. It is not just a matter of taking existing hulls and canting them . A new set of benifits and problems come into play and trade offs in design with canted hulls.
A simple analysis or view of a hull traveling through water if visualized or seen in a test tank would have much less form drag if more symetrical, this is the goal and benifit of a canted hull design by alligning the hull cant with ideal heel angle that it is sailed . Another lesser benifit of a canted hull design is how the boat approaches waves when heeled ,-again more symetrically which combined with wider flatter hull shape as is typical of the canted type design, should be less prone to pitchpole with proper design of larger volume bow sections and hydrodynamic lift from flatter lifting hull shape.
Hull allignment becomes more complex with canted hulls that use deeper narrower bow sections which is no problem at higher speeds with one hull up ,but somewhat a problem at lower speeds and in seas downwind with both hulls in the water. On hull shapes with canted deep high sided narrow bows there is more of a bow down reaction or tendancy from sail forces , this causes a wider underwater dimension from hull to hull as they submerge more. That is the more the bows submerge the greater the misallignment of canted hulls and the greater the form drag of one hull working against the other . Some C Class cat designs in the past with deep narrow bows had a distictive tow in hull allignment appearance ,-The designers averaged out the allignment and designed this in, again hulls never go through water perfectly level but are always heeled or should be ,with a high and low pressure side.
The solution to this problem when designing a canted hull type is to create a hull that reacts to sail forces equally along its length to heeling to negate bow down effects from sail forces,or evan design in a stern down tendancy, many of the trimaran designs desire this in the ama design with much larger volume bows than stern sections .This is similarly accomplished by larger volume bow sections in cat hull design. The Inter designs are one example of this type of large bow area volume hull design ,having a 16 in. width by station 3 or 4 back from the bow, they work well with spin and have less total hull drag at speed , they are however at some disadvantage to non canted hull types in lighter and medium winds ,no trap type conditions particularly in choppy seas where the sharper deeper bows sections cut through waves better and the boats are not heeled as much . Hull design is generally divided into 10 equal sections from bow to stern and drawn in overlay of each in sequence ,--see the 18 sq post by D Lenke for an example ,-then side profiles added , waterline and top deck views,and sail plan boards rudders hardware bulkheads etc added, These are generally refined and revised sometimes hundreds of times with different aspects of design considered with each change or revision such as varied amounts of cant in the hulls ,-larger sails, mast rake ,board locations ,hull variations ,- etc etc .
Some do this just as a hobby !!
The larger the beam of a particular design the less degree of cant is required . That is due to the hull lifting clear at less angle on a larger beam cat . The exact angle of cant required for a planning type hull would place the bottom plane of hull between the direct opposition to the forces at work on it and the optimum verticle lift derived from it. This varies with wave height and seas conditions , also to a lesser extent with varied boat and crew total weight. Considerabley more cant is required on the planning type than currently used it would seem if drawn in total section view at sailing attitude and heel.
I think the big advantage of canted hulls will be found in the development towards flatter underwater hull bow section shapes and the hydrodynamic lift created , we already see this trend in a number of A cat designs and the Inter designs. In future cat design development this combined with lifting canted foils and larger lifting spin,with greater luff angles on longer spin pole will develop into a planning type cat design that will be potentially much faster than the planning 18 skiffs, yet unlike skiffs still handle waves and surf which is some of the most fun of catsailing ,-surfing down the backs of big waves ,-It would be evan more fun to plane and lift up to surf most of the time.--- hope we see these soon ,--.
Re: WOW- an 18 sq with spin design ,--
[Re: D_Lemke]
#28060 01/26/0406:29 PM01/26/0406:29 PM
Thanks - a forward crossbeam foil might be the solution in adapting the older 18 sqs to a spin ,-it would transfer loads just as the N -60S needed for the larger jib ,--and later helped with added spin loads with pole attached to the forward hull top connection foil ,--{not an underwater foil} -its an alum crossbeam near the bows in effect .
Tons of feedback!!!! Carl, have you been studying hydrodynamic design since the last time I talked to you?? Really liked the answers you posted.
I have knocked around the idea of canted hulls and a three beam boat to take the load of the spinnaker. Remember the G-cat's -- solid, solid, solid platform in heavy waves and chop. Never flexed, never torqued. I think three carbon beams would be light enough and the extra strength would definitely offset the extra weight. Also, with enough thought placed into the design the front beam should never be a wave slap problem. THink of a playstation style bow. Ok ok ok, I know that I am known to drive the boat nose down but I really think that it will work and look cool too.
Any thoughts. Also have not knocked the idea of stretching the boat to 20 feet and still run with the "Iron man" concept.
Ready to hit around the neck and shoulders....... Steve
just a quick comment. Back when I first started sailing cats, my first purchase (early 1970's) was a cat with very thin, deep, symmetrical aluminum hulls. The hulls virtually "sliced" through waves, but because they were so small and thin, hobbyhorse became an issue sailing in waves.
On this boat, the manufacturer had included a front cross beam at the bows, which kept the bows stable, provided for a jib bridle wire connect at the bow, but offered (then) a unique feature. The beam was aluminum in construction and of a somewhat triangular shape. The way it was attached, provided a foil "lift" completely across the bow when the bows started going down into waves. In all the time I sailed it, not once did I worry - or come close - to a pitchpole while the bows were down. If you decide to build, a similar arrangement could be incorporated to help pop the bows back up if they start down. Always thought it was a neat idea and wondered why more companies didn't use the concept.
Sounds like a Sizzler. I worked for the factory in Ohio. That bow "foil" you are talking about was supposed to do exactly what you described -- keep the boat from pitchpoling. I think that others did not adopt it because everyone said, "Yeah, well, it brings the bows back at a certain angle of attack, but if the bows were to go down at a greater angle of attack, the bow foil would actually tend to take it on down instead of bring it back up." (We didn't do enough on-water testing to learn the answer.)
The designer of the boat and the bow foil was Carl Swenson, and I'm sure he has long since departed this world.
He also invented some lifting foils for the hulls (sort of like butterfly wings) that clamped onto the forward part of the bottoms of the hulls. People said the same thing about them -- would give lift until the boat exceeded a certain degree of forward pitch, and then disaster.
But that was long ago and he was doing early experimentation.
Re: Bow Beams
[Re: Mary]
#28064 01/28/0412:13 AM01/28/0412:13 AM
Hans Geissler was actually a salesman for Sizzler before their demise, and took some of what he learned from their design and incorporated it into the G-Cat.
Speaking of G-Cats, it would be easy to widen a 5.7M and turn it into a psuedo 18sq ('cept it's 9" too long). The mast, mast-beam and aft-beam are H16 mast sections and the fore-beam is a H14 mast section. You could cut the G-Cat mast and turn it into the rear two beams, cut a H14 mast and turn it into a front beam, and then slap a taller mast on it and run a big mainsail.
I've given a lot of serious consideration to widening my boat to 10-12'... but keeping the same rig + a screacher. This should turn it into a nice all-weather Gulf of Mexico boat
G-Cat 5.7M #583 (sail # currently 100) in Bradenton, FL
Hobie 14T
Sounds like a Sizzler. I worked for the factory in Ohio. That bow "foil" you are talking about was supposed to do exactly what you described -- keep the boat from pitchpoling.
Oh thank God !!!! And all this time I thought it was a bad dream 1
Yes - it was a Sizzler 16 that fit (mast height) between a Hobie 14 and a Hobie 16. A little underpowered, but I can attest the foil worked !
Purchased used in 1974 from Brennan Marine up in Bay City Michigan. Interesting tidbit. Brother-in-law and I went to watch DN class in Caseville in "thumb", and they had moved races to Tawas (across the bay) Decided to take in a February boat show at Brennan's and saw the Sizzler. Bought it the next week. Never did make the drive around to the other side of the bay for the DN races.
Biggest problem I had, was the internal hull foam shrunk and pulled back from the hulls, leaving about 1/4 inch all the way around. Water would run down the tramp post and into the hull, making it heavier and heavier. The stern (narrow) transoms were too high and had no drains. Had to "pop" off the "bottle cap type plugs" on the top of each hull, turn the whole thing over and leave it that way for winter. By spring it was dried out and lighter again! Good times !
I saw somewhere, that they were going to try to market the Sizzler again. Even saw some info on the Sizzler 21 and "Super Sizzler" - but then nothing! About 2 years ago - unless THAT was the dream!
It wasn't a dream. I had a story in Catamaran Sailor a couple years ago. I talked to a guy in the Cleveland area who was going to buy all the tooling and left-over hulls and parts from the original owner of the company. I don't know if he ever went through with it. Guess not, or he would have called me to get some publicity for it.
The foam was the biggest problem with the boats. It sounded good in theory -- fill the hulls completely with expanding foam, and then supposedly there was no way for the hulls to take in water, so you didn't even need a drainhole. But in actuality, there were usually voids in the foam here and there, and water did get in, and there was no way to get it out of those isolated pockets. On top of that, even though supposedly the foam itself would not absorb water, many of us were convinced that the foam WAS absorbing water and getting heavier and heavier over time.
The standard Sizzler 16 was a little underpowered, so they quickly came out with the Super Sizzler option, with taller mast and more sail area. That was a really good boat, very well balanced, and fast. And talk about wave-piercing bows!! No other cat has ever had bows that sharp.
The Sizzler was the inspiration for Hans Geissler's G-Cat designs -- at least the deep, sharp, underwater profile that made it possible to have efficient, symmetrical hulls without boards.
P.S. There was also a Sizzler 18, but I have never heard of a 21.
keep us updated on the project ,think an 18 sq with spin would be GREAT , fUNNY how some of the A Class builders a decade or two earlier switched to the more powerfull and open development oriented 18 sqs
ok here is the update. Picked up a set of plans based kind of on the west system plans. Have had a naval architect add a wave peircing bow which brings the boat to just about 20 feet plus or minus 3inches. THe beam is ten foot. Mast will be about 34 feet once I can get hold of Martstom. We are building a plug now for the hulls. THe hulls all come out of one mold with a cut out in the deck for canting daggars (hope it works well) The hulls attach to a base plate and the plate controls the cant of the hulls. Beams will be carbon. I'm working on the dolphin striker with a guy out of australia. Daggars and rudders will be bought off the shelf as I do not want to build them. Rudder castings will probably be a stock part also. The boat is a three beam boat with a custom front carbon beam, the pole attaches to the front beam and bases out on a plate under the front beam. I plan on doing a end boom sheeting system and a curved track that attaches to both hulls and the rear beam. Hulls will be carbon and foam. I am looking for a good supplier of carbon matt. I have desided to use west systems as it is a known quantity. My dad went and got the materials for the plug today and as we are expecting a huge storm here will probably start tommorow on it. As for drawings I can't seem to get the damn things loaded on this site.
Hi Steve... Although you said carbon matt...I will assume you ment carbon cloth...Try these guys...you can buy small quanities of several of the more difficult to find fibers... http://www.fiberglasssupply.com/
I am sure they can help you out...not bad prices either...
Bob
Re: Thanks -
[Re: Seeker]
#28070 02/04/0411:17 AM02/04/0411:17 AM
If I calculate right, a wing sail with slot like wild turkey doesn't need a spin. With a slot (like flaps on an airplane) the wing can develop say 2 1/2 times the standard wing lift before stalling (with a lot of drag, which is ok off the wind). This would be enough to pitch pole even with a 25' rig at about 12 mph true wind. Sounds like a winner to me. Am I right? Bill?
I haven't compared pricing with fiberglasssupply (they certainly have the best motto!) but look at www.aircraftspruce.com as well. Their catalog has many more items in it than are shown on their website - they ship very quickly too.
I actually lucked out and found a defense dept. contractor in my hometown back in MD that builds those UAV drones. Quite a bit of CF weave goes into those apparently. I used to be able to pickup some sizeable waste scraps that suited my needs back when I was trying to make that boom. Sorry guys, don't have the hookup anymore
Thanks for the info on the suppliers and I will be calling them all! Dad started the plug today and as he will be snowed in tomorrow I can say that I feel the plug will go together fast. Then its the next step and then hopefully building the first hull. YEAHHHHHH! Ok I know that I am a few months off from that but I am excited. Will keep it all online and I am looking into a website so that we can do progress reports.
Carl, whats your thoughts? Still thinking about the ironman concept?
I do not know if you guys are interested in reading this or not. Preamble I successfully made a set of what I admit are pretty rough A-Class hulls using a layup of 5.7 oz carbon, 5 oz Kevlar, 3/8 inch Corecell foam, and 5.7 oz carbon going from outside to inside laid up in a female mold using vacuum bagging. On the first version of the hulls, I made the bows too skinny and the boat was scary going out in any breeze. The boat bows would dive when any kind of gust would hit, but it certainly had no trouble piercing waves. As long as the wind was steady, it would go through boat wakes very smoothly, exhibiting no hobby horsing at all. But when it was gusty, the bows would dive very easily. Due to the topside of the bows being almost pointed, the hulls could be driven in a bow down manner without showing any tendency to go under further, and as soon as the gust would let off, the hulls would pop up and we would continue along at full speed. I will certainly use this topside shape again.
I did not like this tendency to dive as I feared for my mast so in the middle of last winter, I dug out my skilsaw and cut off the bottom on one of the hulls. I spread the front by 2 inches near the bow tapering to 1 inch at the main beam . This caused some seperation of the outer skin from the foam due to the high stresses involved in doing the spreading. A carbon skinned hull is pretty stiff, so something had to give. I made new bottoms that are wider than the hull width at the front, and had a completely different shape than the old hull bottom, so had to fit pieces of foam to join everything together. Due to the inability to vacuum bag the layup when applying the final layer on the bottom once the bottom was glued on the top, several areas of the carbon did not attach well to the foam. It took several months of head scratching to figure out how to do the changes, and then once figured out, the second bottom was cut off and the new bottom glued on and finished within 2 weeks. All in all, I like the new hull shape and am considering making a new mold to make a good set of light hulls. My current hulls are over 50 lbs each due to several of the things I did wrong in the building process. I lost about 3 lbs each hull with the new bottoms that I put on. My next hulls will be built utilizing a lot of different design changes, and all the things I have learned, and should weigh about 35 lbs each. On my next hulls, I may use 4 oz unidirectional carbon fabric instead of woven. It is a bit cheaper, and the fibres will all be straight then which will provide greater strength. To get cloth on at 45/-45 degrees, it has to be overlapped 2 inches where there is a join, or you have to purchase fabric that is made on the angles. That proved pretty costly, so I overlapped the cuts with resulting bumps.
So here are some things to consider if you are making a set of hulls:
Try to make sure that you get the layup real dry, especially if you are doing multiple layers. Lots of epoxy means added weight with no structural benefit. When making beams or foils with multiple layers of fabic, the way I get a relatively dry layup is to wet out one layer, get it as dry as I can with a plastic sqeegee, put it in the mold or on the mandrel, and then take a second dry layer and put it over the first layer. If you use your hands or plastic spreader and work it a lot, you can get it to wet out with the excess of the first layer. It took several poorly made laminates with lots of wrinkles in the layup to get this method figured out. If the layup is too wet, the layers will move around easily, and it will be easy to get wrinkles in the layup, plus the excess epoxy gets squeezed out of som areas and into others so you get bumps. If you get wrinkles, you are probably not getting the fabric dry enough, so on the next piece you make, try for less epoxy!
When you are doing a multiple layer layup do not lay the vacuum hose over the layup as it will move the top layers of cloth and form them around the hose. Then when you pull off the vacuum layers needed, you will have a mess, having a nice half round track in the layup where the hose was. Trust me!
When using foam core material, do not put cuts in it to help it mold to the shape of the hull. As you have to fill the cuts in the foam with epoxy, plus the epoxy will fill a minimum of the outer 1/16 of the foam, it will require way more epoxy and make heavy hulls. I used 3/8 inch 4 lb core cell for my core on my hulls and used a heat gun to form the hulls to the shape of the mold. When it proved very resistant to bending by heat gun (too thick), I used knife cuts and then had to fill them with a microballoon epoxy mixture. I tried making a heater box first, with poor results as it took too much energy to mix the air around, and it would have cold spots. It would be possible to do it successfully, but you would need way more air movement than I tried with using 1 8 inch furnace ductto move the air from 1 end to the other. The top of the mold was real hot, and the bottom was cold, so the foam would not mold.
I was the most successful with using a heat gun to mold the foam about 1 sq ft at a time. Once the foam is close to the shape of the hulls final shape, the vacuum will be sufficient to get it the rest of the way. After my first design proved too skinny on the front, I made a new bottom using quarter inch foam and had a way better success molding it with the heat gun. My next hulls will be made with ¼ inch 5 or 6 lb foam.
If you are designing your own hulls, if you have hard chines in them, it adds to the complexity of getting a decent layup. Everywhere you have to cut the foam, it adds places that you have to spend lots of time making sure the core is perfectly fitted to the mold. A way of making a hard chined hull easier is to just glue on one skin at a time. Then if the core moves on you in the first vacuum bagging process, it is relatively easy to fill the gaps with microballoons and put the inside skin on. You will need double the amount of mastic and plastic you use for that though.
Make sure your mold has no pinholes in it. If it does, you will have voids in the layup where the air is coming in. These will not only have to be fixed but will likely leave a bump on the hull where the void was after you fill it with epoxy. Trust me on this!
Make sure the mold is fair before starting to build your hulls. If you are making a Cat, fairing the mold once is better than having to fair both hulls you make with a mold that is not fair.
I made my molds by cutting out frames for every foot, boxing them in with 3/8 inch plywood, and then using 1/8 inch mahogany door skins being tortured into shape of the frames. The door skins plywood did not like this, and would go to whatever shape it wanted between the frames. What I had to do is run a stringer down the length of the mold about 6 inches apart, and try to straighten out the skin. Then when the skin was close, I had to fair out the mold with epoxy/microballoons and sand till smooth. This used a huge amount of fairing compound (costly) and took vast amounts of time (read over a month), but I did not have to do the fairing twice and put more weight on my boat hulls. The Mold leak did require pulling off about 4 sq ft of carbon off the front of one Bow and replacing it. It made a mess of the bow and took more time and money. Do a good mold first thing!
What I would do for a mold now: I would cut out plywood stations every ft, make a box that is close to the size of the dimensions of the hull, buy stiff insulating foam in 2 ft by 8 ft by 2 inches thick sheets, line the box with the building foam, and then use a wood rasp or sanding block to shape the foam to the shape of the hulls between the frames. Once shaped, I would then cover with 3 or 4 layers of fiberglass cloth in epoxy and sand smooth, fairing with microballoons as needed. You would then have a fair, solid boat mold that you could tape a vacuum bag to and make your hulls. It would be a lot of work, but less than what I did, and should not have any leaks. I would also put a face of at least 3 inches wide on the top to use as a face to use the mastic on when vacuum bagging. It is pretty normal for me to get some amounts of cloth hanging over the edge when making a hull half. These have to be trimmed later, but can get in the way if you have made the mold face too narrow, and can cause sealing problems with the mastic. I learned to always have a tube of silicone sealant handy to use to fix leaks in the vacuum bag, and holes in the plastic can be fixed by applying a short piece of packing tape to the hole. For the plastic barrier, I just used heavy duty constuction plastic. It worked fine.
Another thing you have to watch for is getting a good vacuum. The pump is important in that it has to be capable of sucking a decent volume. When you use mastic, and it has a few holes in it, sometimes you cannot tell where the holes are if the pump does not suck enough volume to be able to hear a whistle. Make sure you use a good mastic, too. Sometimes I would use packing tape, and if careful, it can work. I found that 3M packing tape is so much better than the cheaper stuff that I will buy nothing else now. I purchased rolls of mastic from fibreglasssupply and I would do that again. It was real good stuff. When I ran out of that, I used some stuff that I bought from a glass shop that they use to install windshields. That was not nearly as good.
You can use any nylon that is breathable for the peel ply. If it is waterproof, it will also be epoxy proof and you will not be able to get the excess epoxy out of the layup.
For breather layers, I used quilt batting. Walmart prices are okay, but I found better prices at a discount fabric store later on. I sure got lots of funny looks going into the fabric stores for this stuff though!
For most of my layups, I used mastic applied around the mold face and gained a seal against the mold. On the last few things I made, I would just stick the piece in a plastic bag. Bags are easy to make using packing tape to seal off the edges. That sure worked easier as long as the bag has just a few holes in it. It seems impossible to get a bag with no holes in it, so you are always hunting for the leaks in the bag, and sealing them with packing tape. Having a roomy workshop would help that a bit.
When applying the plastic vacuum film, it is quite important to make sure that there is lots of extra plastic in pleats. If there is not enough, or the pleat is in the wrong spot, the plastic may not go into every crevice and then you can have a void in the layup.
I made 4 daggerboard halves before I got one suitable to use for making my mold. At first, I tried to make ones that I could use in a daggerboard. Finally, I made one that turned out good by gluing cedar to a plate glass, and then carving it and sanding it until it was the shape I wanted. I then covered it with one layer of fiberglass, and achieved a shape that was thin enough to be accurate. I then made a mold by laminating 7 or so layers of fiberglass on top of the shape I had made, cut out the foil shape in half inch plywood, and bagged it on top of the laminated fiberglass. When I made the cedar shape, I made it long enough that I could make each end the shape of the daggerboard tip, so I can make each daggerboard half by using opposite ends of the mold. That worked good.
When making something as big as a mold for a hull half, it is imperative that you are extremely accurate in the mold shape. Foam with carbon on each side does not like to bend at all, so any mold inaccuracies are not easy to fix. Even being out by as little as a sixteenth of an inch can make for joint problems., and ugly hull joins. I had thought that a sixteenth or even an eighth should be close enough, but my next set of hulls will have a simpler design and I will try to be extremely accurate. I wound up grinding a lot and adding layers of carbon for the joints.
I used bubble pack on one rudder layup. This is not a good idea. I had all these little bubble indentations in the layup that I had to grind out. I now stick with using 2 or 3 layers of quilt batting for breather, and it works fine.
I made my own beams on a 3 inch round aluminum tube. It is imperative when doing a thick layup like this to make sure that you get the layup dry so that it does not squirm under vacuum, and that you do not get any wrinkles in the peel ply. This will make wrinkles in the tube you are making. You will ether have to fill the wrinkles in later or grind them out. When making my front beam, I made it about 12 layers of 9 oz carbon thick with an additional 5 layers on the top and bottom. It was supposed to be about 10 layers thick, but was so wrinkled from using too much epoxy and other reasons that I had to fill in the wrinkles and put another couple layers on to get it close to smooth.
Getting too much epoxy in the layup seriously weakens the layup. With too much resin between the layers of cloth, the resin will crack and weaken the stucture. With the beams, I made them thick enough that they are okay, but it is way wiser to get the layup real close to the ideal of less that 50% resin content. One guy has suggested to me to weigh the resin to be added and make sure it weighs the same as the cloth, and only use that much. To make beams now, I would add 4 layers at a time, using the second and 4th layer to soak up as much epoxy out of the wetted out layers as I could. I might even try doing 3 layers and use 2 layers of cloth to soak up the excess out of the one layer of wetted out cloth. I have started making my rudders and daggerboards by making the skins first, and then adding the foam core later. To add the foam core, I butter it as lightly as I can, let it harden, and sand it, then glue it in. I think this will make it lighter and absorb less epoxy.
My next set of A-Class hulls will be made by lightly buttering the foam core and letting it harden before the skins are glued on. When using foam core, it soaks up a significant amount of epoxy, penetrating about a sixteenth of an inch into the foam. By buttering it real lightly, I hope to lessen the epoxy penetration, let it harden, and then sand it to make sure the skins will adhere to the foam. I had someone suggest using peel ply on the foam as a means of not having to sand after. That might work. Another means of not having to sand would be to not let the buttered stuff harden totally before gluing on the skins. Epoxy will bond chemically to other hardened epoxy up to a certain time limit. If the skins are glued on before that time limit is reached, the laminate should bond to the foam/epoxy perfectly in a much lighter layup. In talking with Ben Hall some time ago, he said that they made 2 hulls that were identical except for the weight. They took far more care in keeping the layup dry in the second set of hulls and the hull weighed over 5 lbs less.
Another thing to be aware of when making your own hulls is there will likely be a significant number of pinholes in the hulls outer skin. This can easily be fixed before painting by sanding the hulls, mixing some epoxy, and spreading it on the entire surface of the hull using a plastic spreader. If you make sure the spreader has no nicks in it and that you leave no ridges of epoxy behind, you will have a minimum of sanding to do after letting it harden, and it will fill all those pesky holes. If you try to paint the boat without doing this fill, the holes will show up in the painted finish and are almost impossible to fill any other way. So do the hull with epoxy. It is worth it. When you build rudders and daggerboards, you need to do the same thing. It will save you lots of time, especially if you get the layup real dry. The dryer the layup, the mor epinholes by the way.
Whow, this is all really good advice! I just wish you posted this two years ago as it would have saved me a lot of work Thank you for posting such comprehensive information!
Two small ideas.
Instead of wet layup and vacumbagging, do some research on resin infusion instead. I have done some vacumbagging, but I'll try infusion on my next projects instead. A fiber/matrix ratio of 70/30 has been mentioned by infusion instead of about 60/40 as in wet layup and vacumbagging. It is also a much cleaner and less stressful technique (if you get it to work!).
When doing one-off hulls, make the stations as you have done. But instead of torturing plywood to make a mould, use longitudional battens secured to the stations. Bend the foam (with heat) onto the form and infuse/vacum the inside with the proper glass/carbon/kevlar and matrix (epoxy, poly, vinyl) Install bulkheads and then infuse/vacum the outside.
Check out http://www.fram.nl for some pictures and do a Google for resin infusion.
Probably have to convert your drawings to a jpeg format and limit the size. Most file formats (e.g., Adobe PDF) are not supported. What format do you have? Do you want some help trying to convert it?
An e-mail to your prodigy eddress bounced...
John Williams
- The harder you practice, the luckier you get - Gary Player, pro golfer
After watching Lionel Messi play, I realize I need to sail harder.
There is the post that Dick L provided earlier on the N 18 SQ basic lines . hope that helps
John ,--great post on the Formula 14 new class and helping get it going ,-It should be a fun class and hope the final Formula 14 class rules allow for both a production boat class based largely on the Mystere 14 ,--and also an open category sub class of Formula 14s within as proposed on the F-14 forum .
The concept is very much like the 18 sq meter class of earlier decades that can have a {production }boat like the Nacra as a part of it ,-or allow custom boats to be built with more development and interesting ideas added ,they used 2 categories .
Hope you forgive my sometimes unusual sence of humor and small town outlooks and hope the concept of design measurement rating ,-improving it ,and it being much more intergral with these types of 14 16 etc Formula classes based in design measurement is beginning to make some sence . ISAF provides the means of standardized measurement proceedures and required definitions which are the basis of these classes and the basic language used to understand them . http://www.schrs.com/schrsdiagrams.asp?id=boat
But ,It is all just sailing ,--fun stuff , and try to go with the flow ,-but it seems N A is slowly backwardly going this general direction . You see it in the enthusiasm for the new F-14 class , and here in the interest in 18 sq ,-though old and in need of updating.
Steve ,-really like your new spin rigged version 18 sq as proposed , the added length to 20 is the right remedy for the added spin forces at work ,-but it is no longer an 18 sq ,-but isn,t with a spin added anyway, though sounds really expensive with marstom mast and c f hulls . Do you have an estimated cost ?
I would really enjoy building a developmental cat design again , though currently have a SC 15 --A H-18 plus another H-18 platform -a Mystral board ,-cayak -and Inter 20 -
Would like to modify the SC 15 to Formula 16 class specs for my boys to potentially race ,--same with the H-18 ,needs a spin -snuffer and a modified category F-18 class to race in . Would like the Inter 20 to eventually become the basic of a Formula 20 comperable cat class for all 20 ft cats. Imagine a ht 20 will be out in future years comperable to the Marstom 20 or Ventilo 20 by MM .
I did recently draw a basic set of lines for a planning hull spin rigged 18 sq , though would start with a 2 in = one ft --one meter type scale model first.
The nice part of a 14 open F-class is the reduced costs in that size range being able to experiment with ideas and concepts inexpensively ,--relatively speaking ,-mainly by retrofitting existing parts and beams boards rudders etc from other existing boats - --which I have
I,d reall like a Formula 60 ALSO ,-but that has to wait , unless you have a multimillion dollar sponsor set to go or I find one to send the team to race in the Euro circuit . http://www.parlier.org/site02/accueil/1024x768.html I,m ready ,--sign me up .
though most likely will settle for the Atlantic 1000 on 20s -- again
One point that I would like to add to the post of "How To Do It" ...
if using foam, I recommend you NOT give the surface a sealing coat of epoxy.
You will wind up with a rough surface once epoxy cures, and must re-sand/fair it back down. If factory smooth finish is still there - don't worry about sealing it. If a cut and sanded surface is there, get an old iron (clothes type - don't use the wife's!!!) Try it on some scrap, but heat it to the point where running the iron over the surface of the foam, will heat, melt and smooth the foam's surface. This seals the foam, and even less epoxy is needed.
Picked up this trick via r/c sailing, where weight containment is even more critical on 1 to 2 meter multihulls than it is on 18 footer real boats.
Another thought, is to lay up foam strips similar to a strip kayak or canoe. Cut on bandsaw, and run edges through a jig on router table adding bead and cove profiles edges. These allow for the strips to fit together, but the rounded edge also allows for the strips to take on a curve without producing the gaps which need to be filled. Strip foam construction requires additional support to prevent the strips from bowing between your cross section templates - especially if you are using 1/4 inch thick strips. What is nice about this method of foam cores, is the ability to cut the strips to thickness needed - so in the hull area, you can use maybe 3/8 to 1/2 inch, while on the flatter sides or on deck areas not subject to loads, you can go down to 1/4 inch for core. A home made hot-wire to cut/shape foam is also very useful. Lots of plans on the internet. I used stainless steel fishing leader wire for the heated wire part and a small electric train transformer for the power supply to heat up the wire. This also leaves a very nice, smooth finish that doesn't take up a lot of epoxy. If you want to get fancy, you can use untempered 1/8 inch hardboard or thin sheet aluminum to make foil shapes. Once you cut the foil shape, the can be added to the front of round cross beams to fair in and give a nice result.
What happened to this thread
[Re: majsteve]
#28080 08/19/0412:20 AM08/19/0412:20 AM